User Guide of Magento 2 Order Export Extension
General Configurations
At the backend, go to FME EXTENSIONS > Configurations. Here you can find the extension configurations.

Cron Settings for Export
- Enable: Option to enable or disable the cron settings for export
- Frequency: Specify the frequency of cron i.e. how often the cron job will run
- Start Time: Specify the time when cron will occur

How to Add Export Order Profile?
At the back end, go to SALES > Export Orders. Here you can find the grid of all your export order profiles. Click on the Add New Profile to add a new profile or Edit button to edit an already added profile.

Provide the following information.
- Automatic Execution: Enable/Disable the Cron for any specific profile.
- Export Duplicate: Select yes/no, if you select ‘No’ then the item will not be exported again which has already been exported for the current profile.
- Name: Provide name for the profile (back end use only)
- Exclude Child Products: Options to skip child products on export
- Exclude Parent Products: Options to skip parent products on export

- Change Status To: Exported orders will get specified status after export. The status of the order will be updated only in the exported CSV / XML file, not in the database.

- Store View: Specify the store view on which it will be applied

- Allow Order Filters: Specify the order number filters from the following
If you select ‘Order Number,’ you must provide a specific order number. In the case of ‘Order Total Filter,’ you need to provide the order grand total. If you select ‘Starting From and Ending With Filter,’ you must provide the following two fields:
- Starting From #: Enter the order number to start the export from, e.g., 100000040. Leave empty to ignore.
- Ending With #: Enter the order number to end the export with. Leave empty to ignore.

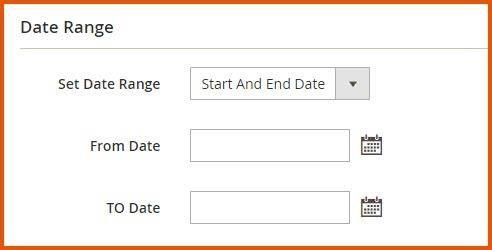
Date Range
This section allows you to export orders of a specific time period.
- Set Date Range: Option to specify the date range for export.
If you select ‘Specific Date’, you have to provide a specific date. In the case of ‘Start And End Date’, you have to provide the following two fields:
- From Date: Enter a start date
- To Date: Enter an ending date
- Export by Customer Groups: Select ‘Yes’ or ‘No’ to filter order export file by customer groups
- For Customer Group: Select one or more customer groups

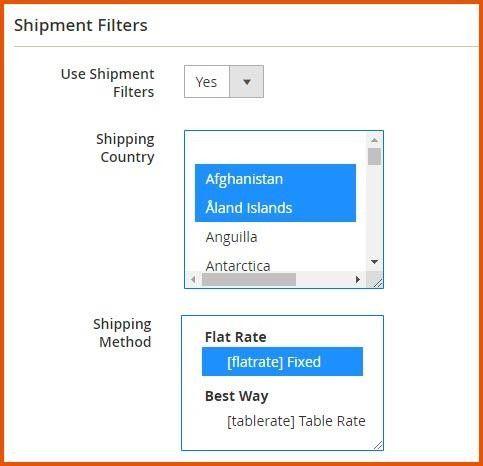
Shipment Filters
This section allows you to apply shipping filters on order export.
- Use Shipment Filters: Select ‘Yes’ or ‘No’ to use shipment filters for the Profile
- Shipping Country: Select the shipping country
- Shipping Method: Select the shipping method
- Use Invoice Number Filter: Specify the invoice number filters from the following:
- Starting From #: Specify the starting invoice number i.e. invoice number to start export from. Ex. 100000040, else leave empty to ignore.
- Ending with #: Specify the ending invoice number i.e. invoice number to end export with, else leave empty to ignore.
- Skip Starting From: Select yes/no, if you select ‘Yes‘, then export will start from the order which is next to the specified in the “Starting From #” field. Else specified order will be exported as well.
- Automatic Increment Starting From: Select yes/no, if you select ‘Yes‘, then it will automatically fill “Starting From #” field with the least exported order invoice number after each profile run.

File Properties
- File Name: Only file name required with no extension. Both will be used for the saved file and the one upload via FTP. (Note: Please don't use "_" in the file name e.g. order_information).
- File URL: Provide a URL path for the rule to use. Example: "/orderexport/" or "/" for the base path (path must be writeable)

Data Format
-
File Format: Specify the export file data format
-
Order Items Delimiter: If the order has multiple items, then this field works as a separator between items e.g. @, / etc.

FTP/SFTP Configuration
- Upload Exported File By FTP: Select ‘Yes’ or ‘No’ to upload the exported file by FTP
- Protocol: Select the protocol to upload the exported file
- Host Name: Enter the host name. It can be an IP address or host name.
You can add port at the end of host name e.g. ftp.domain.com:22
- User Name: Enter the user name
- Password: Enter the password
- Directory Path: Enter the directory path. Full path of a directory e.g. /var/www/path/to/your-folder/

Email Settings
- Send Exported File via Email: Select ‘Yes’ or ‘No’ to send the exported file via email
- E-mail From: Select the sender of the email
- E-mail Address: Enter the email address
- E-mail Message Subject: Enter the subject of the email message
- Compress Exported File in ZIP: Select ‘Yes’ or ‘No’ to compress the exported file in zip

- Export Fields: Options to export all fields or only specific fields

Run History
Here, you can view all run history by clicking on Generate for the rule, as highlighted.
