How to Configure SMTP Email Settings in Magento 2?
This article will discuss everything there is to know about the Magento 2 SMTP configuration.
SMTP And Default Magento Settings
SMTP stands for Simple Mail Transfer Protocol, and it is a standard for sending and receiving electronic mail (email) across the internet. In the context of Magento or any other web application, SMTP is often used to handle the sending of emails from the server to recipients.
Magento, by default, provides basic email functionality using the PHP mail() function. While this is suitable for many smaller setups, it might not be the most reliable or feature-rich solution, especially for larger e-commerce stores. However, it is no longer the case with Magento 2.4.6.
Default Magento 2 Email Settings
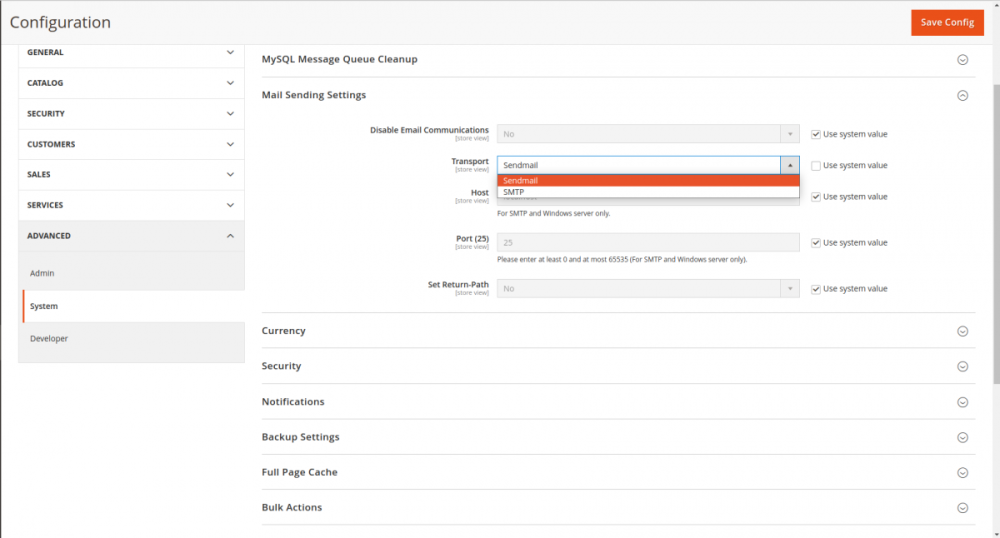
With version 2.4.6., the default Magento email settings have seen major improvements. This version removes the need to get a third-party extension to set up SMTP as you can see below.

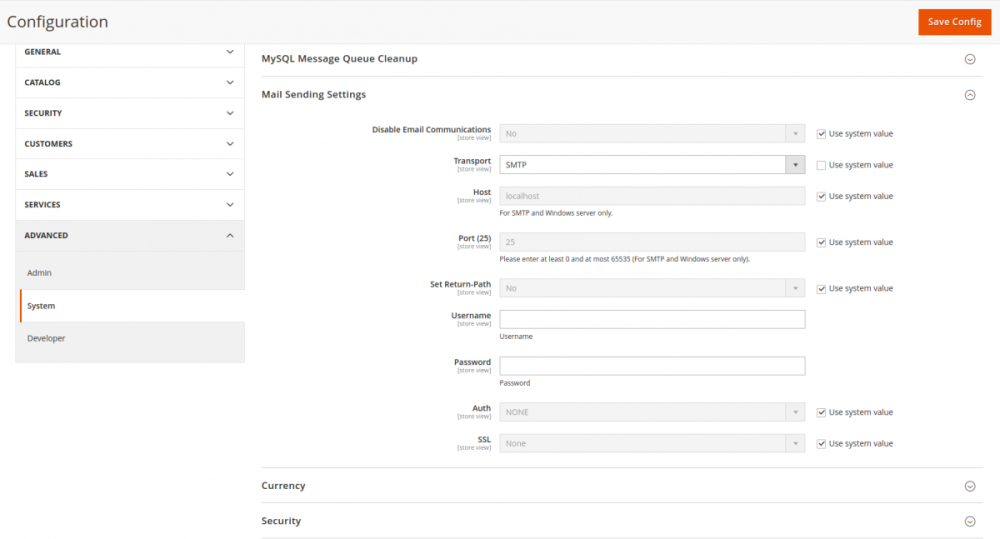
Users have the earlier option of Sendmail and now SMTP as well. If you select SMTP, you are provided with further options as shown below.

Sendmail, which was previously the only setting in Magento, may work for simple email needs, but they might encounter issues with deliverability, reliability, and email tracking. Many businesses prefer to use a dedicated SMTP server or a third-party SMTP service to enhance email delivery and provide additional features.
Third Party SMTP Extension vs Default Magento 2 SMTP Settings
With the default settings, you have limited features. For instance, there is no option for email tracking and detailed analytics. On top of it, if you use the default SMTP feature, there’s a higher chance that your emails are marked as spam. Lastly, as your business grows, you may notice that the default version is not enough to meet your growing needs. Although an extension requires money, it offers various features that are a must-have if you wish to succeed. This makes the purchase definitely worth it.
Steps To Configure Magento 2 SMTP Settings
For the sake of this tutorial, we will look at the SMTP configurations in the SMTP Extension by FME Extensions. The extension is highly customizable and allows you to choose from multiple SMTP providers. Configuring the Magento 2 SMTP extension by FME Extensions involves a series of steps to ensure your store's email functionality works efficiently. Here is a general guide on configuring the SMTP extension:
Step 1: Install the Extension
Step 2: Configure SMTP Settings
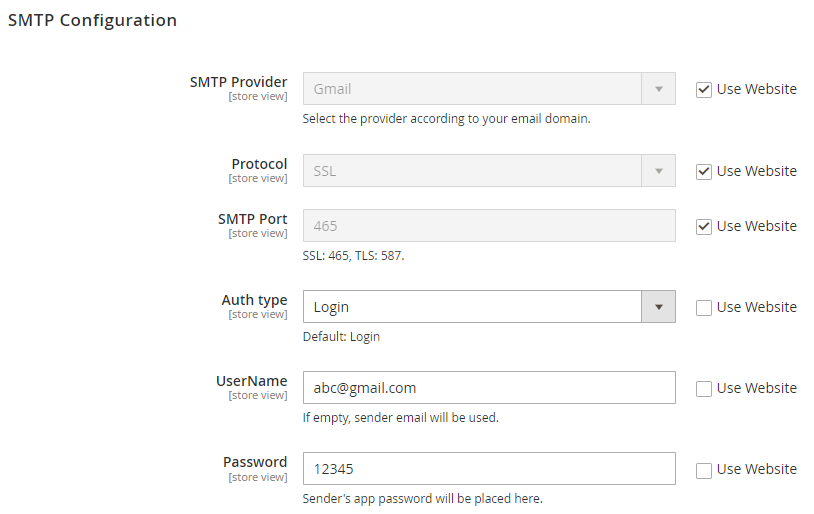
After installation, login to your admin panel and go to FME Extensions > SMTP Configuration > under SMTP.

- Enable the extension.
- Enable email log.
- Choose your SMTP provider.
- Choose the Encryption type (SSL or TLS).
- Fill in the SMTP Port.
- Enter your SMTP Username and Password provided by your email service provider.
- Set Sender Email and Sender Name.
- Save Config.
Step 3: Test Email Configuration
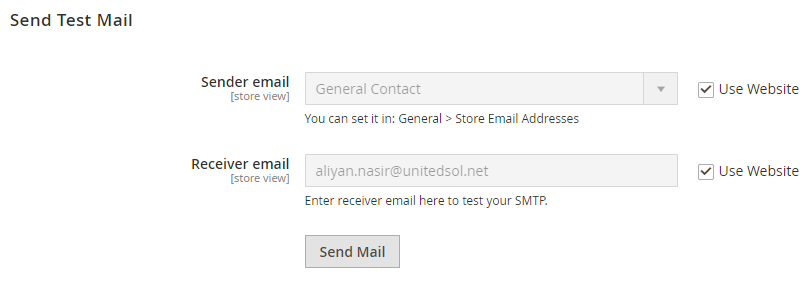
After saving the configuration, go to the Send Test Email tab in the extension settings.
- Enter a test email address and click the "Send Test Email" button.
- Check your provided email address for the test email. If received, it indicates successful configuration.
Step 4: Clear Cache and Reindex
- After configuring the extension, clear the Magento cache by running php bin/magento cache:clean.
- Reindex using php bin/magento indexer:reindex.
Final Thoughts on Magento 2 SMTP Settings
Your Magento 2 store should now be configured to send emails using the FME Extensions SMTP extension. Regularly test your email functionality to ensure smooth operation and consult FME Extensions' documentation or support for any specific issues or questions related to the SMTP extension.
Check Out Other Extensions:This blog was created with FME's SEO-friendly blog


