Latest news, tutorials, and best practices for Magento

How to Add Canonical URL in Magento 2? (Complete Guide)
If you are searching for ‘Magento 2 set canonical URL’, then you are at the right place. In this article, we will discuss everything there is to know about: Add canonical tag to product pages Add canonical tag to homepage & other CMS pages Add canonical tag to any category page Add cross domain canonical tag Add canonical tag to pagination & category filters Lots more So, let's get started by first developing an understanding of canonical URLs. What are Canonical URLs? By now, you know that if you upload duplicate content, search engines will deindex your website promptly or apply some other penalty. However, in some cases, website owners have no choice but to use duplicate content (we will discuss more about this in detail later). To avoid content duplication penalty from the search engines, the best course of action is to select one URL to index. Google and other search engines will only display the selected URL in search results. This allows you to keep multiple pages with duplicate content but without having to worry about any penalty. Reasons Behind Duplicate Content There are several reasons why a website may have duplicate content. Let’s examine a few of them in detail. Region Variants The topmost reason why websites have duplicate content is because there are two same webpages but for different regions. Suppose your store sells in the UK and the US. For whatever reason, you have two separate pages – one for the UK audience, and one for the US. It makes little sense to have different content for both pages since both pages serve the same purpose. Device Variants Similarly, a few websites have set up different versions for desktop and mobile phone users. Again, although they are two different pages, they have the same content. Protocol Variants Additionally, your website may have two webpages – one with HTTP and the other with HTTPS. From the crawler’s perspective, they are two different pages. So, you’ll have to determine which one to index. Other Reasons Other common reasons include failing to remove demo or test pages before getting the website live. Content Duplication in eCommerce Content duplication is a common issue in e-commerce stores. This is because e-commerce stores have a lot of unique pages with almost the same content. For example, multiple products or category pages may have the same or very similar content i.e. product descriptions, features, guidelines, etc. This can also happen if you have a snippet of text that appears on multiple pages. Having a short duplicate content is OK but if it exceeds 100 words, Google may think of it as a copy of another page with a distinct URL leading to content duplication issue. This is where the concept of canonical tags comes into play. A canonical tag on a page tells search engines that this page is an exact copy of the destination URL and hence should not be treated as a unique page. Best Practices for Magento 2 Set Canonical URL Keep in mind that setting a canonical URL does not indicate the crawler will accept your request. Remember, the canonical URL is a hint, not a rule. To improve the probability of the crawler accepting the canonical URL, follow these best practices: Never use the robots.txt file for setting a canonical URL since it serves a very different purpose. When interlinking on your website, always link to the canonical URL. Don’t use a URL removal tool as it removes all URLs. When using multiple canonical methods, don’t set different URLs as the canonical URL. How to Use the Extension to Add Canonical Tags in Magento 2? Although Magento 2 allows adding/implementing canonical tags from within its admin panel, the choices are very limited. Therefore, we believe that the best way to add canonical tags in Magento 2 is through a third-party extension. For this article, we will implement the canonical URLs using the Magento 2 Canonical URL Extension that offers some advanced features when it comes to adding a canonical tag. 1. Add Canonical Tag To Product Pages The extension allows you to add a canonical tag for each product page from the product edit sheet with the following options. Custom URL Use Config (Canonical tag you have set for all products from configurations options) Canonical URL with Category Tree Canonical URL without Category Tree Go to any product from backend and expand the Search Engine Optimization section. 2. Add Canonical to CMS Pages To add canonical URL to CMS page in Magento 2, Open: Admin Panel, navigate to Content -> Pages Click on Edit page & expand the Search Engine Optimization section Enter a custom URL to override the default canonical URL In this way, you can easily add canonical URL to homepage as well. 3. Add Canonical Tag to Any Category Page To add canonical URL to category page in Magento 2, Open: Admin Panel, navigate to Catalog -> Categories Select any Category & tap the Search Engine Optimization tab Enter a custom URL to override the default canonical URL 4. Configure Cross Domain Canonical Tag You can configure the addition of canonical Meta tag to a storefront, store view, or a custom URL as well. 5. Exclude Specific Pages From Canonical Tags Application With the help of the extension, you can exclude specific product or category pages from canonical tags application. 6. Add Canonical Tag For Pagination & Category Filters This feature allows you to add a canonical tag to pagination pages. You can also elaborate relativity of layered navigation pages to products and category pages. Enable/Disable Canonical Meta tag to catalog pagination pages Allow/Disallow Canonical Meta tag to catalog layered navigation – for filtered or current category page 7. Add Trailing Slashes To make the most of this extension in terms of SEO, add trailing slash for canonical Meta tag. This will make your store’s URLs user and search engine friendly. This Magento 2 Canonical URL extension is a complete content duplication solution. It makes canonicalization super easy to implement. With the introduction of the above extra features, it makes your pages more crawlable and search engine friendly while improving the ranking signals for content available through multiple URL structures. Conclusion That’s it for this tutorial. If you have any issue in adding canonical tags in Magento 2, then ask our expert Magento support team . Related Articles: Magento 2 SEO – A Practical & Easy Guide Add Image Alt text in Magento 2 with a Ready Made Extension Create & Manage Gift Card Products in Magento 2 Automatically Add Internal Links in Magento 2 Add Store Pickup Shipping Method in Magento 2

How to Restrict Payment Method by Customer Groups in Magento 2?
After reading the title, you may be wondering why anyone would search for ‘Magento 2 payment method by customer group’. After all, it makes little sense to offer only specific payment methods for some customer groups. Well, after reading this article, you’ll know that restricting payment method by customer groups is not only important but a must-have feature for every online store. Need for Magento 2 Payment Restrictions by Customer Groups There are several cases wherein you may need to apply Magento 2 payment restrictions by customer groups. International Customers Suppose you serve two markets – A and B. Your store is based in market A, thereby allowing you to offer cash on delivery (CoD) payment method. Market B represents another country. It makes little sense to offer the CoD to international customers. Thus, the best option is to restrict the CoD for the international customers. Fraud Unfortunately, payment fraud is a serious concern for online businesses. The below image provides an overview of the most common types of online payment frauds. Source: Statista According to the above image, Google Pay and Apple Pay are the two most secure options since the instances of fraud with these two platforms is quite low. If your store is experiencing high levels of frauds from a specific customer group (e.g. Market B), you can restrict their payment methods to the most secure options only. This allows you to continue operating in the market and curtail losses simultaneously. Compliance Did you know that Visa, Mastercard, and American Express are no longer available to the Russian market? These restrictions were announced in the aftermath of the Russia-Ukraine war. To ensure compliance with these restrictions, the only option is to restrict the three payment methods for Russian customers. Instead, they can use other payment channels that are still legal. Customer Preferences Certain customer groups show a preference for specific payment methods. For example, iPhone users have a natural inclination towards Apple Pay. After determining each group’s payment preferences, you can restrict the other payment methods for them. By offering them their desired option only, you can streamline the checkout phase and reduce cart abandonment rates. Payment Gateway Issues Payment gateways charge taxes and other fees based on the customer’s location. Suppose you are offering gateway A to customers in X and Y. Since A is based in market X, the fees will be much lower. However, market Y represents another country where A has no presence. It is quite obvious that A will charge a higher fee for customers from market Y. Restricting the gateway for Y customer brings down the purchase costs and improves the user experience. Restrict Magento 2 Payment Method by Customer Group By default, Magento offers following payment methods: Check/money order Bank Transfer Purchase Order Zero Subtotal Checkout Cash on Delivery If you would like to disable any of the default or other payment methods, you need to get a Magento 2 extension. This is where we would like to introduce the Magento 2 payment restrictions extension that allows you to restrict different payment methods by a variety of attributes. The ability to restrict payment methods based on different attributes is what makes this extension a must-have. Restrict Payment Method by Customer Groups in Magento 2 To restrict payment methods by customer groups, you need to create a payment restriction rule . First of all, download & install Payment Methods Restrictions Extension by FME . Then Open Admin Panel and Tap FMEextensions on sidebar > Click Manage Restrictions Rules Now Click Add New Rule Fill the following required fields: Name – Define the name of payment restriction Rule Status – Enable/Disable the Rule Payment Methods – Choose the payment method that you want to restrict Store Views – Specify the store view where rule will be applied Priority – Set the rule priority Apply Operation as AND/OR - Set operation to AND if all conditions fulfils the requirement / Set to OR if any of the condition fulfils the requirements Now Click Customer Group Tab Select the Customer Group for which you want to apply the payment restrictions rule Save the rule. Some of the other features of this extension are: Also, checkout our tutorial to Restrict Payment Methods by Specific Customer . Conclusion This concludes our article on how to restrict payment method by customer groups in Magento 2. If you have any questions related to the above discussion, extension, or anything Magento-related, reach out to our team . Related Articles: Configure COD Payment Method in Magento 2 Configure Zero Subtotal Checkout in Magento 2 Configure Layaway Partial Payment in Magento 2 Top Magento 2 Payment Gateways Reviewed

How to Display Best Selling Products in Magento 2?
If you studied mathematics, chances are you came across the 80-20 rule. No? You may know it as the Pareto Principle. According to this principle, 80 per cent of the consequences come from 20 per cent causes. Another way to look at is that 80 per cent of the output comes form 20 per cent input. You may be wondering what does rule have to have to do with bestselling products in Magento 2. We’ll get to that point shortly. If you are a business owner, online or brick and mortar store, you will know that not all of your products are equally popular. Some products sell more than others, meaning they account for the majority share of the business revenue. Other products, while important, account for little in terms of revenue. In other words, 80 per cent of the business revenue only comes from 20 per cent of the products. These 20 per cent products are what are known as bestsellers. As a Magento 2 merchant, you would want to make the most of your best-selling products. One way to do this is to display them separately on the frontend to attract visitor’s attention. Prospective customers have a high confidence level on a store’s bestselling products. They tend to click and buy the products that are already trusted by others. Quick Note: Have a look at FME Product Slider Magento 2 extension which enables you to display Best Selling Products in a Slider in your store. Product Slider Boost sales using Magento 2 Product Slider. Highlight top products like best sellers, new arrivals, and more, all above the fold. Check it out! > About the Extension This extension allows you to display your best-selling products in a way that compel the visitor to click on them. You can display multiple product sliders such as best selling, most viewed, featured, or on-sale. The below image shows products based on most viewed. The image below shows the various ways to set up the product sliders. Similarly, you get to choose where to display the sliders as can be seen below. In some cases, you may need to display the sliders only for a specific time. For example, if you are displaying the on-sale slider, it makes no sense to have it on display permanently. As you can see from the above image, you can decide a slider’s start and end date. If you wish to know more about this extension, book a live demo . How To Find Best Selling Products in Magento 2? You must first find out what your best-selling products are. By default, Magento, as every other ecommerce platform, keeps track of your products, sales, invoices, taxes, and other information. These statistics are necessary and helpful to measure your store’s performance and make business decisions. To find what products have been selling the most, follow these steps. On your Magento 2 admin, go to Reports -> Statistics -> Refresh Statistics . Select all the products in the grid and choose Refresh Lifetime Statistics from the dropdown. Click Submit . Once ready, go to the Dashboard , under the Bestsellers tab, you will see the list of the best selling products in your Magento 2 store. Method to Display Best Selling Products in Magento 2 You can display your best selling products in a widget by setting conditions. Here, we will create a new widget called ‘Best Sellers’ and put our list of best sellers in there. To create a new widget, do the following. Go to Content -> Elements -> Widgets -> Add Widget . In the Type field, choose the Catalog Products List option. In the Design Theme field, choose your design theme and click Continue . Enter the Widget Title that will be displayed in the admin panel, choose Store Views to assign the widget and set the Sort Order. Next, go to the Layout Updates section and click Add Layout Update . Here, you can choose where you want to display your best selling products. You can choose to display them on all pages , specific pages , product types , or categories . Now, go to the Widget Options tab and fill in the following fields. Title: Give the widget a title that will be displayed on the frontend. In this example, we will name it ‘Best Sellers’. Display Page Control: If you choose ‘Yes’, a new field Number of Products Per Page will appear. Number of Products to Display: Enter the number of products you want to display. Cache Lifetime (Seconds): This is the time in seconds between the widget updates. Conditions: Set up what products should be displayed in the widget. You can simply put the SKUs of your best selling products. Once ready, click Save . Final Thoughts on How to Display Best Seller Products in Magento 2 In this article, we have discussed a powerful best seller products extension along with a detailed guide on how to display best-selling products using the default Magento features. Feel free to get in touch in case you have any issue in your Magento 2 store. Related Extensions: Store FAQs + Product Questions Product Labels & Stickers Product Feed
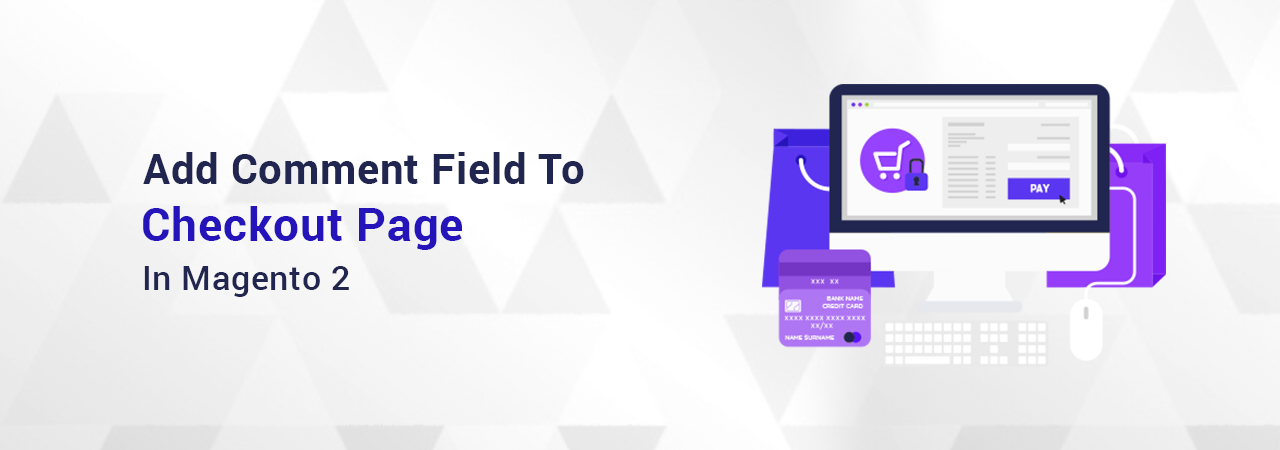
How to Add a Comment Field to Checkout Page in Magento 2?
As a leading Magento extensions company, we have first-hand knowledge of the issues facing online stores. Right now, the concern on every store owner mind is to improve the customer experience. One may think that increasing the marketing budget, cutting prices, or improving product quality are the top solutions to this problem, but that’s not the case. Based on our experience, a few tweaks to the checkout page can get the job done. After all, the checkout phase is the most important part in eCommerce. It determines whether the user will complete the purchase. By enhancing the user experience at this stage, store owners can effectively address the high levels of cart abandonment and improve their store’s sales performance. Source: Statista The above image shows the global cart abandonment rate. As you can see, it is quite high. Depending on your location, the rate might be even higher. Source: Statista The above image shows the cart abandonment rate by region. If you are still not convinced about the checkout stage’s importance, look at the below statistic. Source: Statista The above image shows the cart abandonment rate by product category and device type. Therefore, there’s no doubt that this stage is where you need to focus your resources on. We suggest customising the checkout fields to reflect the target audience’s preferences and to differentiate yourself from the competitors. Remember, the idea is to make the checkout stage as comprehensive as possible. Read More: Why Checkout Holds The Key To Success In Digital Commerce Magento 2 Add Comment Field to Checkout While the default Magento 2 checkout fields such as email address, first & last name, shipping address, phone number, shipping method, etc. are enough to fulfil an order, it’s a good idea to add additional fields to better understand your customers. For example, adding a comment field will allow customers to add any specific details to their order for sellers to take into account while fulfilling the order. Order Attributes Improve checkout by adding custom attributes to gather essential customer info for marketing and operations. Check it out! > Similarly, by adding a “how did you find us” multi options field, you know how every customer reaches your store. This information can prove highly beneficial in enhancing your marketing strategies. Unfortunately, Magento 2 does not allow adding custom fields to the checkout page. Merchants have 2 options to do this. Either write a complex code or use a 3rd party extension. The former option is cost effective but time consuming and difficult with fair chances of errors. The latter one is expensive but reliable and quick. Talking about 3rd party extensions to do the work, our Magento 2 Order Attributes extension offers more value for less money. It allows 12 types of different fields to collect any information merchants need. Most importantly, they can add a custom field to any checkout step i.e. billing address, shipping address, shipping method or review & payments. This goes a long way in personalising the checkout stage and helping merchants get the information they need to improve store performance. In the example below, we have added a comment field to the checkout page using the extension. Steps To Add Comment Field in Magento 2 Checkout Page After you have installed the extension, follow the steps below. On the left sidebar, click FME Extensions -> Manage Fields . Click Add New Attribute . Now fill in the following fields. Default Label: Enter the label that you want to give to the custom field. For example, ‘Comments’. Catalog Input Type for Store Owner: Select the input type for the custom field. In this example, we can select Text Area . Values Required: Select “No” to make the field optional and “Yes” to make it mandatory. Attribute Code: This code is used for internal reference only. Give it any name according to your ease. For example, ‘custom_comment_field’. Default Value: Enter the text that you want to pre-populate the custom field with. Leaving it empty will display the custom field with no text. Input Validation for Store Owner: Choose if you want to validate the field input. For example, if you want users to enter letters only with no numbers, email or URL, select “Letters”. Show in Email: Choose if you want the custom comment field to be displayed in email that is sent to users after the order has been placed. Show in PDF: Choose if you want it to be displayed in PDF. Store Views: Select the store view you want to limit the field to. Customer Group: Select the customer group you want to limit the field to. Categories: Select one or more categories you want to add the comment field to on the checkout page. You can also select specific product(s) by checking the checkbox. Now select the Storefront Properties on the left panel and configure the following fields. Enabled on Checkout: Set it to ‘Yes’. Checkout Step: Select the checkout step that you want to add the comment field to. In this case, we will select ‘Payment/Review step’. Position: Enter the position for sorting purposes. 0 will display it on top. Tooltip: Enter the text to provide extra information about the field when the user moves the mouse over it. Click Save Attribute . The comment field will be displayed on the checkout page as shown below. The extension is also compatible with Magento one page checkout . Conclusion This concludes our article on how to add a comment field to checkout page in Magento 2. Feel free to contact us , if you have any issue regarding the Magento 2 checkout. Other Extensions You Might Be Interested In: Distance Based Shipping Edit Order Checkout Success Page
undefined Magento 2, How To Guide

Magnifier Types With Examples - Magento 2 Image Zoom Extension
If you are looking for a Magento 2 product image zoom extension, then you have come to the right place. This article talks about the various features of the Magento 2 Product Image Zoom extension by FME. The extension enables visitors to zoom product images for a detailed overview. It features an impressive list of magnifier types which can be changed from its configurations. Magento 2 Product Image Zoom Magento 2 Image Zoom: Enhance product visualization with zoom options, including magnifier and full-screen lightbox, revealing intricate details. Check it out! > Why You Need a Magento 2 Image Zoom Extension Product Visibility One of the first reasons you should consider buying a Magento 2 product image magnifier extension is because it enhances product visibility. Unlike in-store shopping, online shopping does not allow customers to pick up the product and examine it physically from different angles or even try it. Therefore, the next big thing is to allow them to view the product in as much detail as possible. Enabling image zoom may help provide much-needed insights. Mobile Optimisation The below image shows the share of eCommerce traffic and orders by device. Source: Statista Therefore, optimising an eCommerce store is must. However, screen size on smartphones is much smaller compared to laptops/desktops and tablets. By using a Magento 2 product image zoom extension, you can allow mobile users to view the product in detail. This can help boost your smartphone conversion rate. Competitive Advantage Offering such a simple yet must-have feature can enhance the user experience. Indeed, customers will value your store if you allow them to view the product in considerable detail. They will reward you with repeat purchases and greater brand loyalty. 9 Magnifier Types with Examples If you buy the Magento 2 Product Image Zoom extension by FME, you have 9 zoom options. These are: 1. Basic Zoom As the name states basic zoom is the default magnifier settings for the extension. You can change the zoom window of basic zoom only with this magnifier type. 2.Tint Zoom Effect Enabling this magnifier type puts the zoomable image in a colour (tint) of your choosing. The tint magnifier type also lets you choose the tint opacity and the magnifier window length and width. 3. Inner Zoom Inner Zoom magnifies the as a whole within the image display area. Other than window length and width which are a standard feature of all magnifier types, inner zoom lets you change the cursor type to a variety of option like Cross Hairs, Grabbing, Pointer, Zoom In and Cell. You can also enable scroll zoom option for higher magnification. 4. Lens Zoom Similar to Inner Zoom, Lens Zoom also magnifies within the image but instead of magnifying the entire image it creates a ‘lens’ which magnifies the area within. Other features include lens type can be changed to a circle or rectangle, lens size can be changed and you also can enable scroll zoom option for higher magnification. 5. Fade In / Fade Out As the name states Fade In / Fade Out is a Basic Zoom magnifier with the ability to fade in or fade out the zoomer. You can customize the fade in / out timings of the window as per your requirements. 6. Easing Similar to Fade In / Fade Out magnifier, this magnifier uses the Easing effect on the Basic Zoom Magnifier. 7. Mousewheel Zoom Mousewheel Zoom magnifier lets you enable scroll zoom option for higher magnification on the Basic Zoom magnifier type. 8. Window Position Window Position magnifier lets you change the position of the zoomed window to any possible position that you may prefer. The GIF shows the window position to be ‘Bottom Right’. 9. Custom Design Window Zoom Every feature the above-mentioned magnifiers have, Custom Design Window Zoom as well. This magnifier is the sum of all the magnifiers where you can customize based on your preferences. To know more about this Magento 2 product image magnifier extension, book a live demo . Our experts will answer all your queries and explain the extension in greater detail. Final Thoughts on the Magento 2 Image Zoom Extension Based on the discussion, there’s no doubt that buying a product image extension ca transform your store. You may benefit from greater sales and increased brand loyalty. We recommend that you check out our Magento 2 Size Chart extension as well. Together, they can greatly improve the online shopping experience.
undefined Magento 2

Magento 2: How to Restrict Payment Methods by Specific Customer?
Magento 2 is an open-source platform having tons of built-in customization options to optimize your online store. If you’re running international business then many time, you need to restrict specific payment methods for a specific region(s) or a customer(s). Why Restrict Payments? Creditworthiness Not every customer has a sound financial history. They may be habitual in making late payments or their desired payment methods may end up being declined. From a business perspective, such customers are just a recipe for disaster. If you cannot stop selling them altogether, the least you can do is force them to pay using a method that is the most reliable and secure. To Prevent Fraud The below figure shows the most widely used payment methods for fraud. Source: Statista It may be that your store is experiencing high levels of fraud from PayPal. You can decide to block it altogether or restrict its use to your most loyal customers only. You may think that out of 100 transactions, only 3,4 may be fraudulent. Hence, there’s no need to look for Magento 2 restrict payment methods. But that’s not the case. As you can see from the above image, eCommerce losses to payment frauds are quite high. Source: Statista These losses will only increase in the coming years. Therefore, the moment you experience a fraudulent transaction, working on preventing it again by restricting payment methods in Magento 2. Customer Preferences Certain customers have a preference for a specific payment method. For example, if you are selling high-value products, customers are least interested in ‘buy now, pay later’ schemes. They would prefer to make a full payment right away. So, offering them methods such Klarna serve no purpose. Remember, if you wish to achieve success in eCommerce, tailoring each aspect of your store to customer requirements, including the payment methods, is a must. Compliance In some cases, certain payment methods are not available due to compliance issues or other restrictions. For example, Visa, Mastercard, and American Express are not available in Russia since its invasion of Ukraine. Therefore, there’s no point in offering these payment methods to customers in Russia. Other Reasons If you offer too many payment methods, you need a dedicated team to manage payment-related issues. The best option is to restrict payment methods for certain customers. This will compel all of them to choose from the few available options. This can reduce your team’s burden and allow them to focus on other business-critical functions. Payment Restrictions Pro Magento 2 Payment Restrictions extension: Customize payment methods based on shipping, customer groups, and product attributes to optimize conversions. Check it out! > Magento 2 Payment Restrictions for Specific Customer In order to hide a specific payment from specific customers, you need to have a 3rd party tool to implement payment restrictions for a specific customer. Checkout Magento 2 Payment Restrictions extension by FME which enables you to restrict payment method by specific customers. Restrict Payment Methods by Specific Customer in Magento 2 To restrict payment methods by specific customers, you need to create a payment restriction rule. First of all, download & install the Magento 2 Payment Restrictions Extension. Now in Admin Panel, click FMEextensions on sidebar > Manage Restrictions Rules > Add New Rule Fill the following mandatory fields: Name – Enter the name of payment restriction Rule Status – Option to Enable/Disable the Rule Payment Methods – Choose the payment method that you want to restrict/hide Store Views – Select the store view(s) where the rule will be applied Priority – Set the rule priority in case you have created multiple restriction rules Apply Operation as AND/OR – Set operation to AND if all conditions fulfill the requirement / Set to OR if any of the condition fulfills the requirements. In our case, this option won’t effect as we’re only applying the rule to a specific customer. You have to specify AND/OR operation only if you have setup multiple conditions in a rule. Now Click the Customer Group /Customers Tab Click the Customers dropdown > Select the customer(s) for which you want to restrict a payment method Save the Rule. Checkout this tutorial, if you want to restrict payment method by a specific customer group . Conclusion If you face any issue while implementing payment restrictions in your store, then feel free to contact our support team for a quick fix. Remember not to restrict a widely used payment method for customers as it will undermine their user experience. Related Articles: Advanced Shipping Restrictions in Magento 2 Restrict Shipping Based on Product Attributes Configure COD Payment Method in Magento 2 Configure Zero Subtotal Checkout in Magento 2 Secure Payments in Magento Store