User Guide of Magento 2 WebP Images Extension
At the backend, go to FME EXTENSIONS > Configurations. Here you can find the extension configurations.
Prerequisites & Information
Now, expand the Prerequisites & Information Tab to check all the requirements.
Library Install
First of all install the library rosell-dk with the following command
- composer require rosell-dk/webp-convert
Catalog Image Resize
Now, Run the following command to avoid any issues with the cached images.
- catalog:image:resize
Conversion Tool Support
Now, verify if the listed conversion tools are installed on the server. These tools are mentioned in the backend settings.
Select Conversion Method
Select any of the below methods to convert the images to WebP image format.
- Through CLI command: fme:convert:webp
- On Page Load: When pages are loaded on storefront, images will be automatically converted to WebP format
Settings
Now, expand the Settings Tab, here you can set:
- Enable: Enable/Disable the extension
- Quality Level (1-100): Enter Quality level according to your requirement.. Using high value (90-100) yields best quality but also bigger size. Don’t forget to clear WebP Image cache after changing the quality.

-
Conversion Tool: You can use any of the 3 conversion tools.
- GD
- CwebP
- Imagick
-
Conversion Tool Support: This option will show you if WebP is supported by any of the selected conversion tools

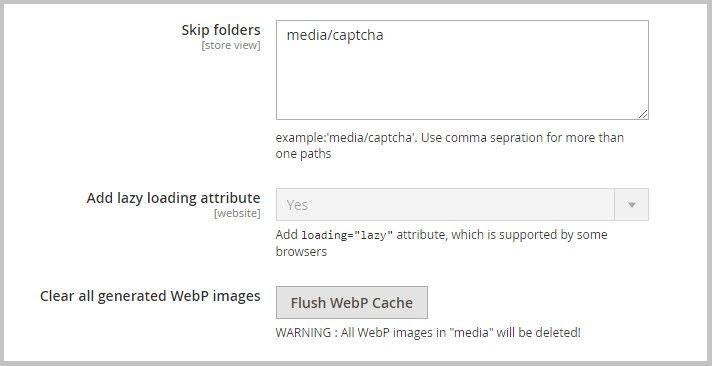
- Skip Folders: Specify folder paths to exclude from WebP Image conversion like example: media/captcha. Use comma separated paths for more than one folder.
- Add Lazy Loading Attribute: Add loading="lazy" attribute, to load only the required images in the storefront.
- Clear all Generated WebP Images: By clicking this button, All WebP images in "media" will be deleted.

- WebP Conversion Test: Enter any image ID to test the WebP conversion. This will show you the Webp image size & quality along with its counterpart.
