User Guide of Magento 2 Store Locator Extension
General Configurations
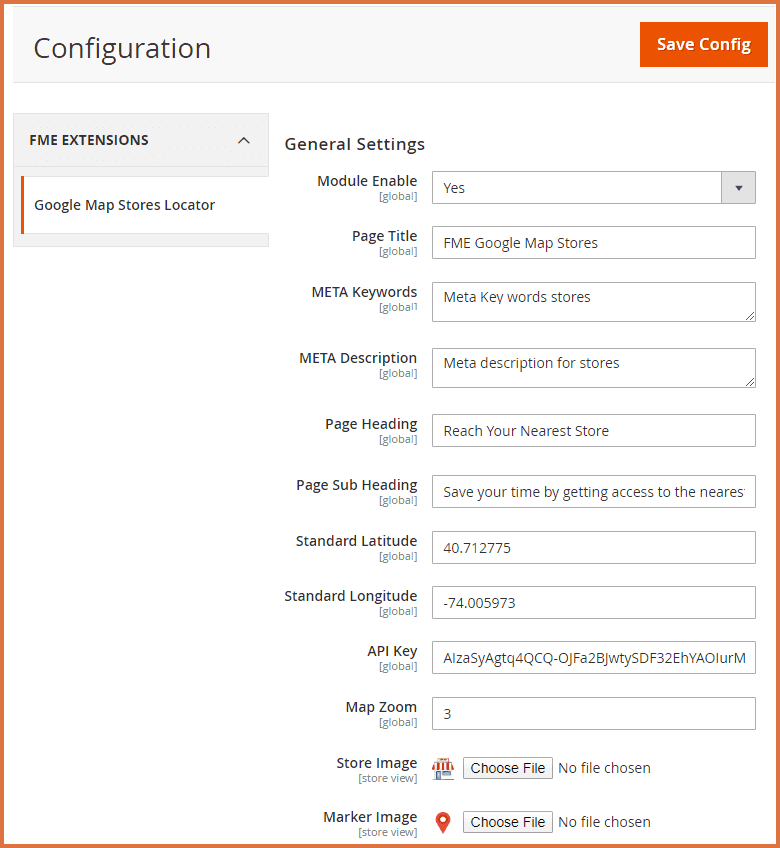
At the backend, go to FME EXTENSIONS > Configurations. Here you can find the extension configurations.
General Settings
- Module Enable: Select ‘Yes’ or ‘No’ to enable or disable the extension, respectively. If the extension is disabled, users will not be able to view or change any modes from the back end and will be redirected to the store’s main page.
- Page Title: Add the title you want to display on the front end.
- Meta Keywords: Enter your meta keywords.
- Meta Description: Enter your meta description.
- Page Heading: Add the main heading to display on the front end. Note: This will be the primary heading of the Google Map Store Locator page.
- Page Subheading: Add the subheading to display on the front end.
- Standard Latitude: Set the default latitude for the store listing page focus on the Google Map.
- Standard Longitude: Set the default longitude for the store listing page focus on the Google Map.
- API Key: Enter the Google Maps API key. This key is used throughout the extension wherever data from the Google Maps API is required.
- Map Zoom: Set the default zoom level for the store listing page on the Google Map.
- Store Image: Upload an image to display with the store listing data.
- Marker Image: Upload an image to use as a marker on Google Maps for the store listing page and store detail page.
Search
- Default Radius: This defines the radius within which stores will be searched on the listing page and tag listing page. Searches will be limited to stores within this specified radius by default.
- Maximum Radius: This sets the maximum allowable radius for searches on the listing page and tag listing page. Stores beyond this radius will not be included in the search results.

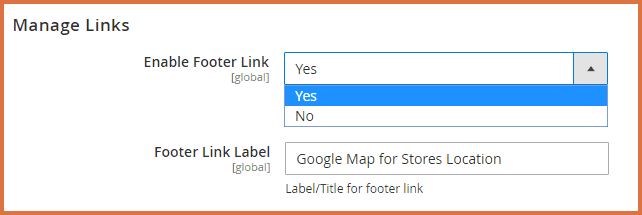
Manage Links
- Enable Footer Link: Select ‘Yes’ or ‘No’ to enable or disable the footer link.
- Footer Link Label: Specify the text to be used as the label for the footer link.
Search Engine Optimization
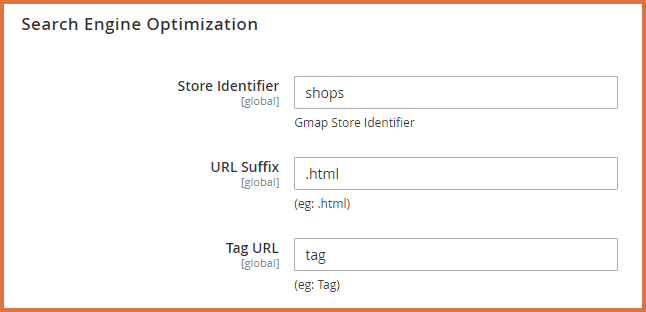
- Store Identifier: Enter the identifier that will be used to access the store listing page on the front end.
- URL Suffix: Specify a suffix (e.g., .html) to be added to the store identifier URL.
- Tag URL Prefix: Define the prefix to be used for tag URLs.
How to Add Stores?
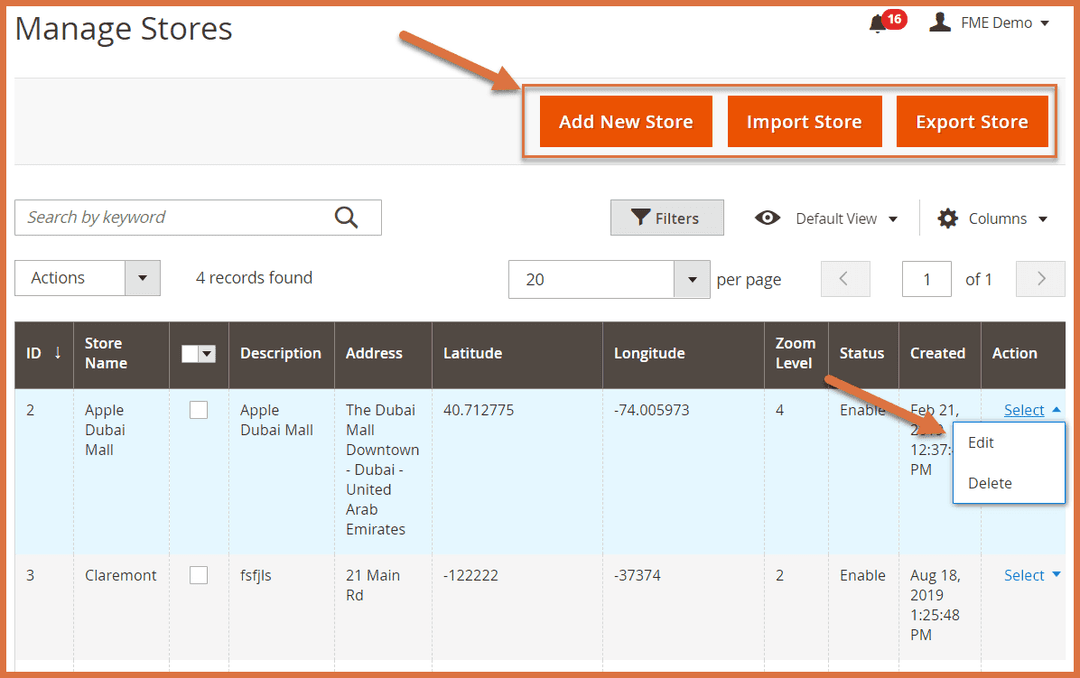
In the backend, navigate to FME EXTENSIONS > Manage Store. Here, you can view all the stores created for the extension. You can Edit, Delete, Import, or Export stores, or click the Add New Store button to create a new store.
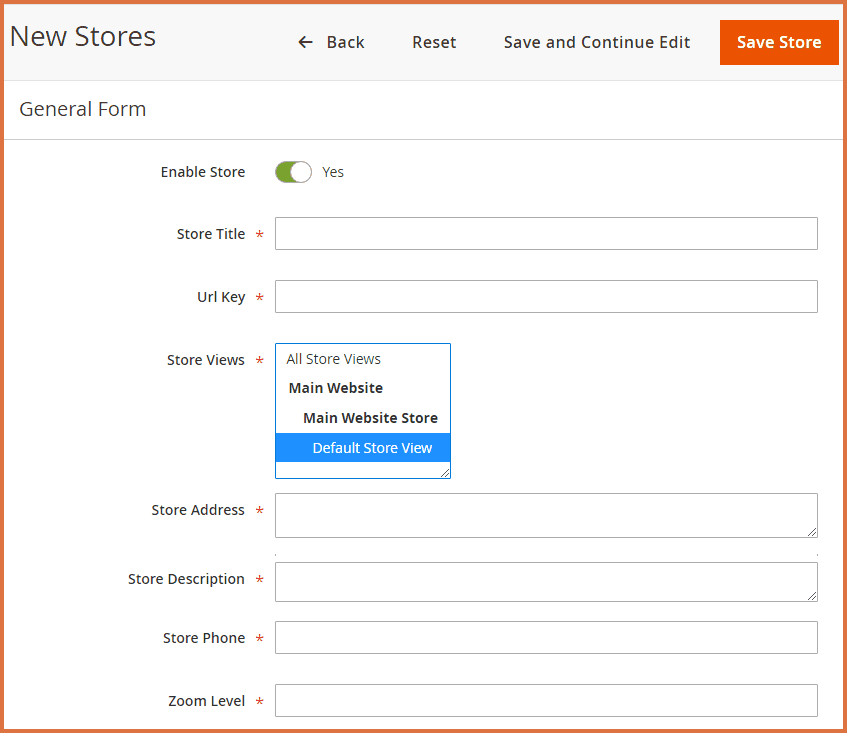
Provide the following information to create a store.
- Enable Store: Select ‘Enable’ or ‘Disable’ to activate or deactivate the store.
- Store Title: Enter the title of the store.
- URL Key: Specify the unique URL key for the store.
- Store Views: Select the store views where this store will be displayed.
- Store Address: Enter the address of the store.
- Store Description: Provide a description for the store.
- Store Phone: Enter the phone number of the store.
- Zoom Level: Define the zoom level for the map display.
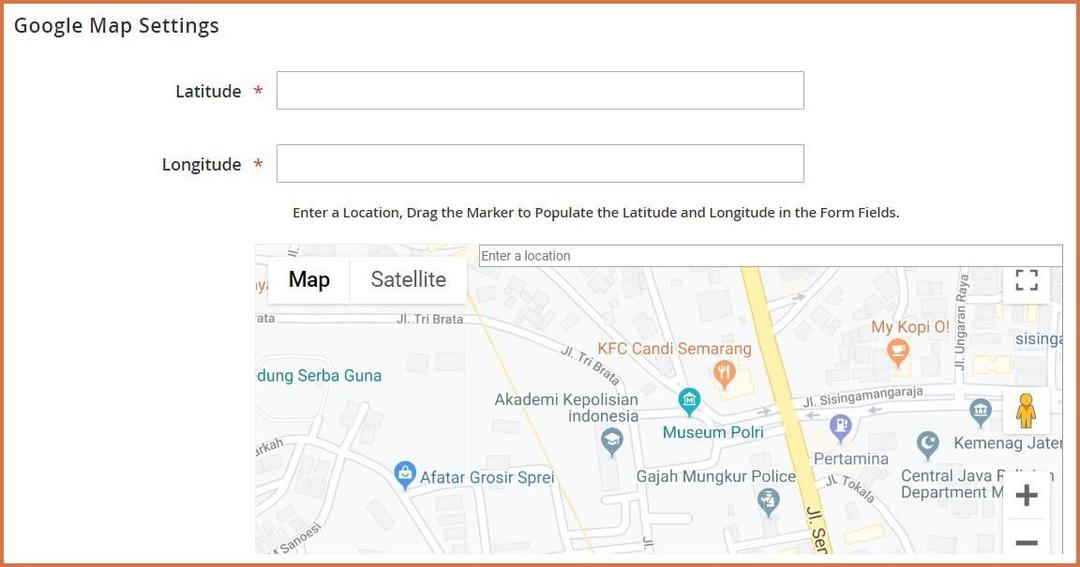
Google Map Settings
- Latitude: Enter location latitude
- Longitude: Enter location longitude
- Search Field: Enter a Location, drag the marker to populate the latitude and longitude in the form fields
Meta Information
- Meta Description: Provide a meta description
- Meta Keyword: Provide meta keywords

Store Timings
- Select Store Timings: Select working hours of the store.

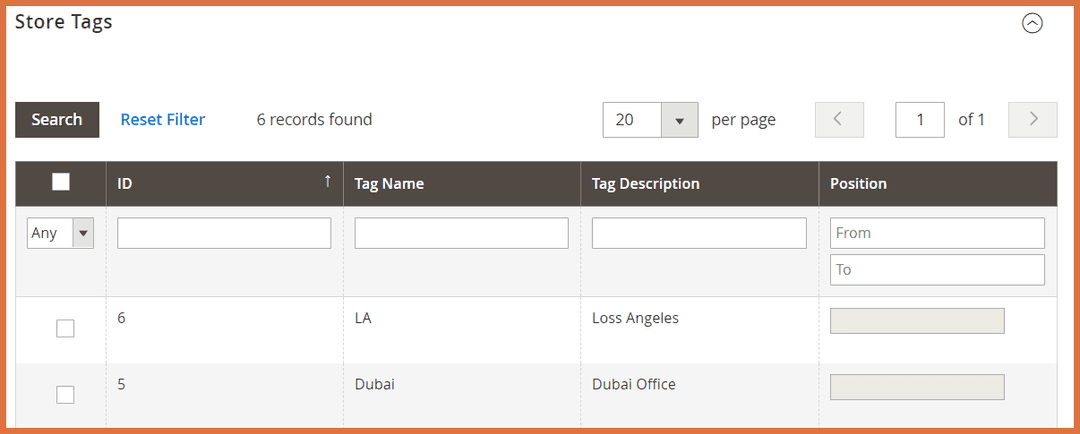
Store Tags
- Specify tags for the store. Users can search stores by tags also.
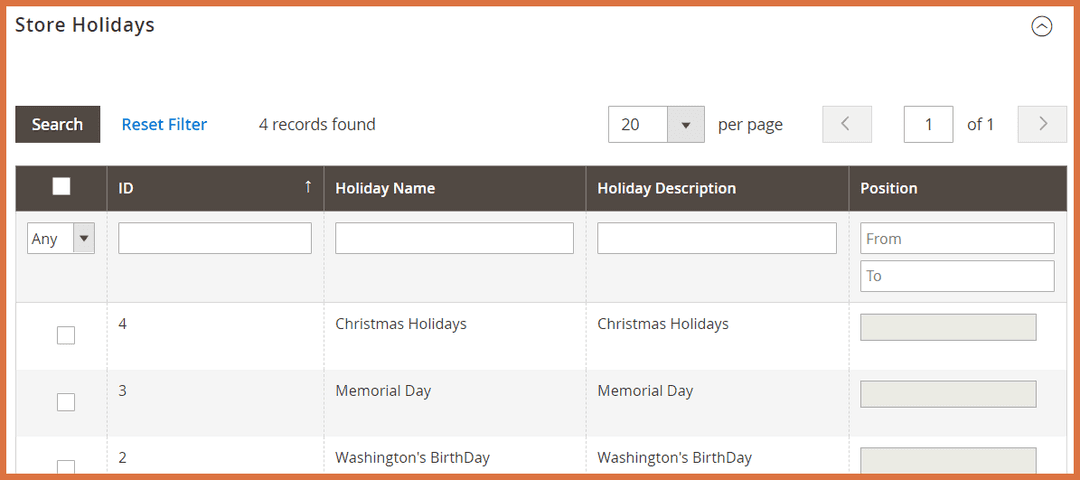
Store Holidays
Specify holidays for the store.
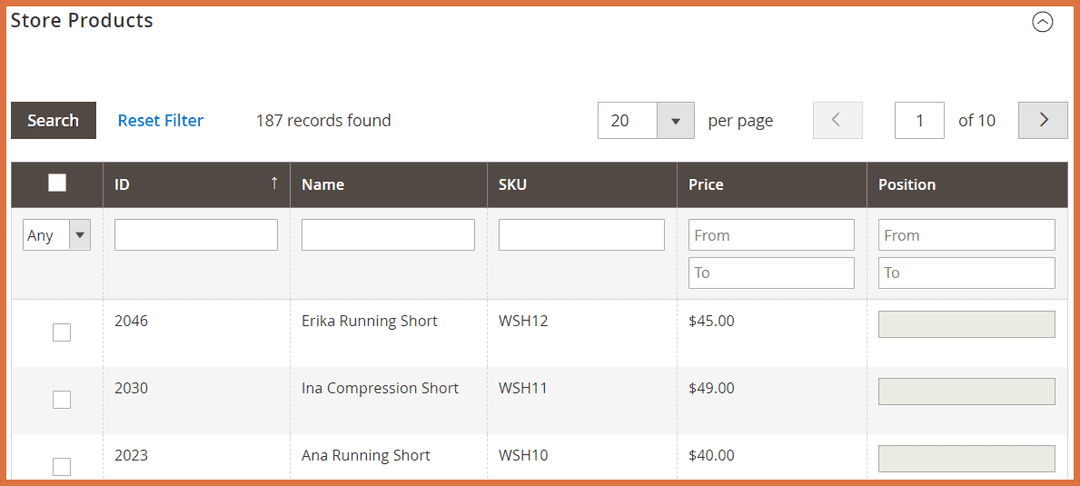
Store Products
Attach products to the store.
How to Add Tags
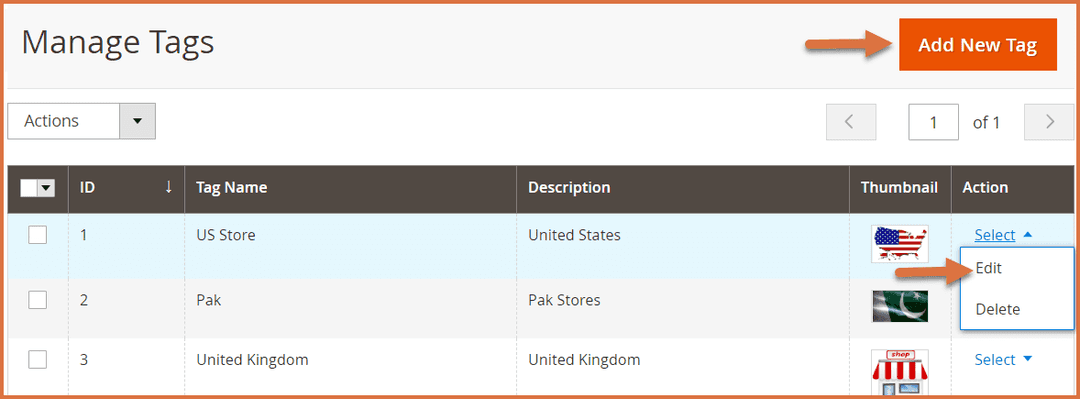
In the backend, go to FME EXTENSIONS > Tags. Here, you can view all the tags for the extension. You can Edit or Delete any tag, or click the Add New Tag button to create a new tag.
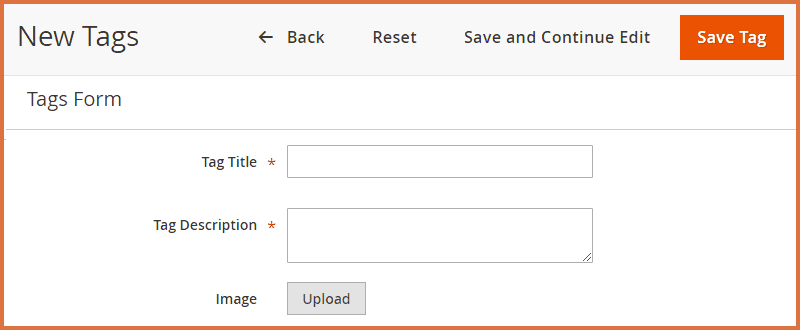
Provide the following information:
- Tag Title: Provide the tag title
- Tag Description: Provide the tag description
- Image: Upload image for the tag
How to Add Holidays?
In the backend, go to FME EXTENSIONS > Holiday. Here, you can view all the holidays for the extension. You can Edit or Delete any holiday, or click the Add New Holiday button to add a new holiday.

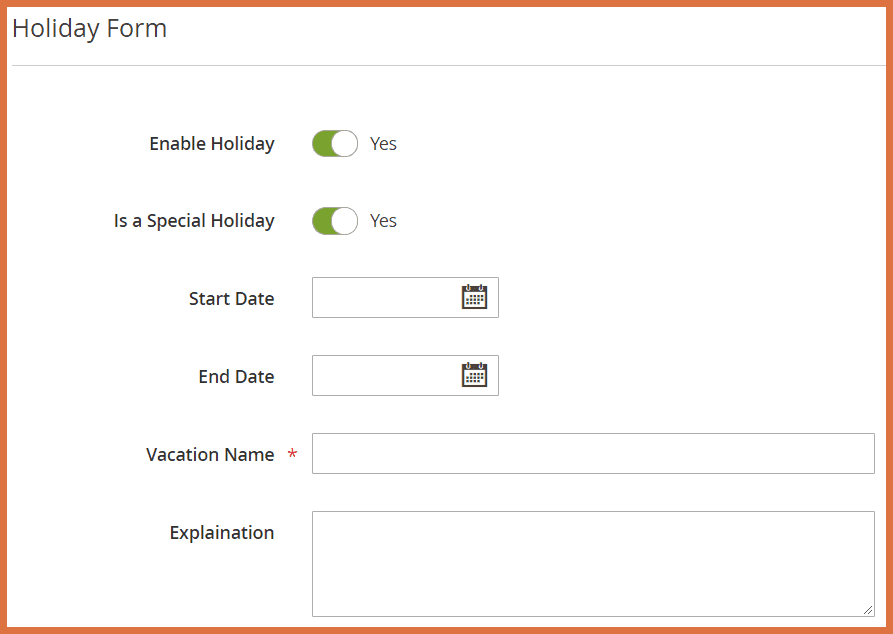
Provide the following information:
- Enable Holiday: Enable or disable the holiday.
- Is a Special Holiday: Mark the holiday as a special holiday.
- Start Date: Set the start date for the holiday.
- End Date: Set the end date for the holiday.
- Vacation Name: Provide the name of the holiday.
- Explanation: Provide a description or explanation for the holiday.
How to Add Timetable?
In the backend, go to FME EXTENSIONS > Timetable. Here, you can view all the timetables for the extension. You can Edit or Delete any timetable, or click the Add New Timetable button to create a new one.

- Enable Timetable: Enable/Disable timetable.
- Timetable Name: Provide name for the timetable.
