User Guide of Magento 2 Lookbook Extension
At the backend, go to FME EXTENSIONS > Configurations. Here you can find the extension configurations.
General Configurations
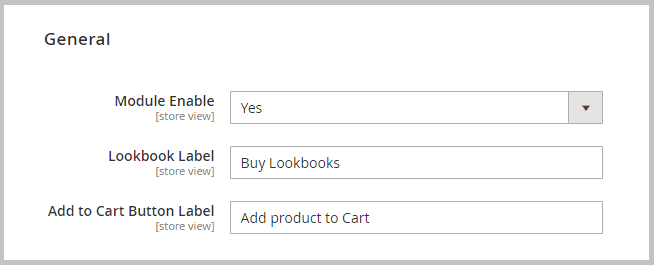
Now, expand the General Configurations Tab & set the following configurations:
- Module Enable: Enable/Disable the extension
- Lookbook Label: Set Lookbook label. This will be displayed on frontend menubar.
- Add to Cart Button Label: Customize “Add to Cart button” label
Add New Lookbook
At the backend, go to FME EXTENSIONS > Lookbook. Lookbook grid will open. Click on the Add New Lookbook button
- Title: Set the title of the lookbook
- Identifier: Set th lookbook identifier
- Image: Upload lookbook product image.

- Once you have uploaded the image, you can add products to the lookbook image. For this Drop a pin at the desired location/product on the image
- Double-click on the image
- Now click on the Add (+) icon. Now click on the Edit icon.
- A popup will appear. Search & Select the desired product in the Search Bar and then click the Save Pin button.
- You can add multiple products to the lookbook image. You can also Edit/Remove the product from the lookbook image by clicking the Edit/ Delete(x) button below the Add (+) button.

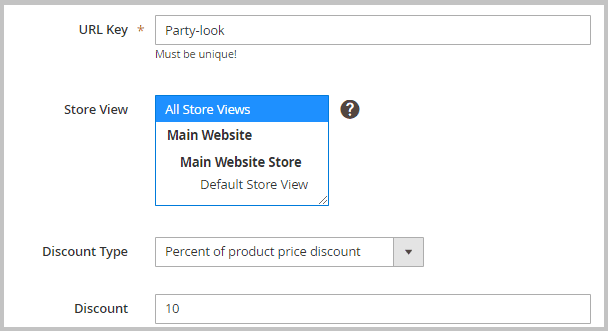
- URL Key: Set lookbook product URL key
- Store View: Select store views to display the lookbook product
- Discount Type: Select the discount type according to your requirements.
- Percent of product price discount: Offer discount in percentage like 10 means 10% of the lookbook price
- Fixed discount amount of the whole cart: Offer fixed discount like 10$, etc.
- Discount: Set the discount amount. e.g. 10, 20, etc.
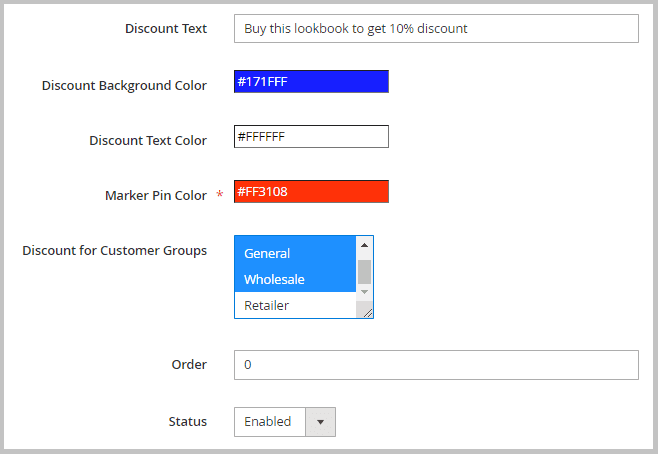
- Discount Text: Add discount text. The text will be displayed on lookbook page
- Discount Background Color: Customize the discount message background color according to your theme
- Discount Text Color: Customize the discount text color
- Marker Pin Color: Set the color of the marker pin according to your store theme
- Discount for Customer Groups: Select customer groups to offer discount
- Order: Set the lookbook order number. The lookbook will be displayed on the lookbook landing page according to the configured order number.
- Status: Enable/Disable the Lookbook
- Save the Lookbook: Click Save the Lookbook button on right top to save the lookbook
Add Lookbook Widget to CMS Page
Click Content > Pages to open the CMS pages grid. Now, open your desired CMS edit page. For this, in Action column, click Edit from the Select dropdown button
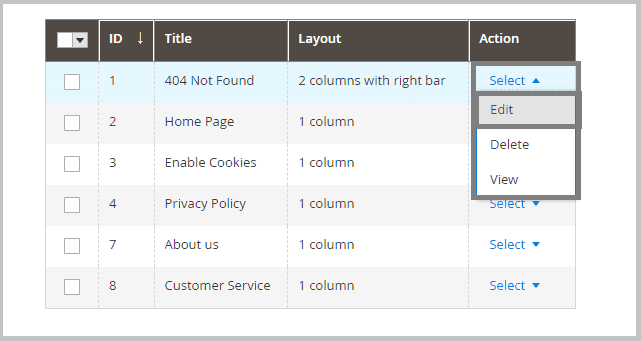
Desired CMS page will open in editor mode
- Expand the Content Tab
- In the Editor click the Widget button

- A popup will appear.
- Select the desired Lookbook widget from the Widget Type dropdown
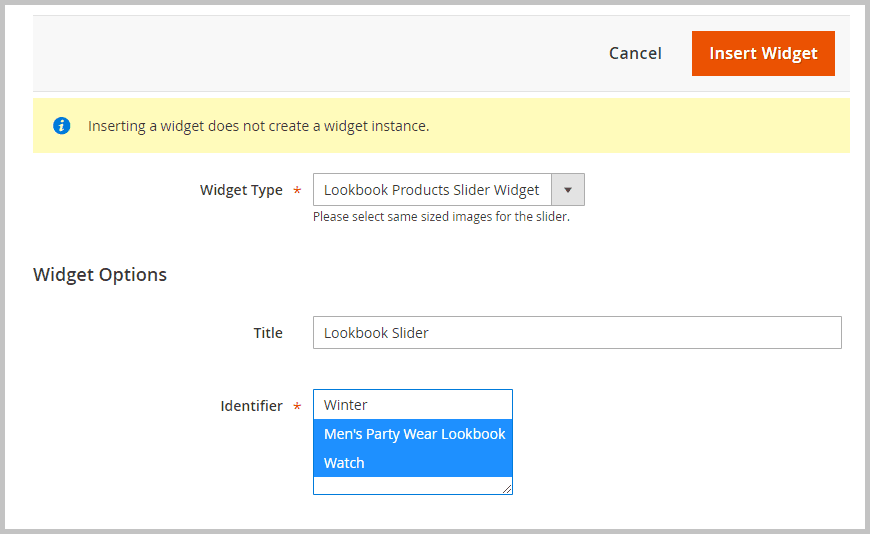
- Configure the Widget according to your requirements.

- Click the Insert Widget button on the right top
Refresh the Cache
- Refresh the Cache: System > Cache Management > Select All from Mass Actions > Click Refresh the Cache.