User Guide of Magento 2 Free Shipping Bar Extension
General Configurations
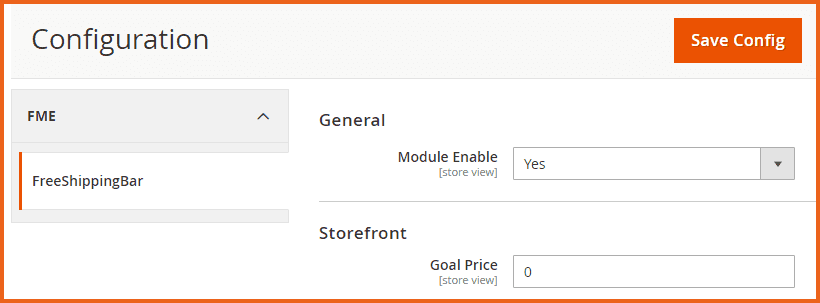
At the backend, go to FME EXTENSIONS > Configurations. Here you can find the extension configurations.
- Module Enable: Select ‘Yes’ or ‘No’ to Enable/Disable the module
Storefront
- Goal Price: Option to set the goal price on which the free shipping applies. For example, if the goal price is 200, then there will not be any shipping charges for all the orders with a price above 200.
How to Add & Manage Shipping Bars?
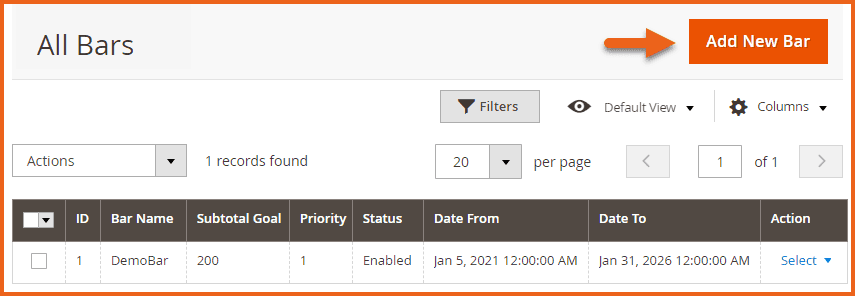
At the back end, go to FME EXTENSIONS > Manage Bars. Here you can find all the previously created bars. If you want to add a new bar, click on the Add New Bar button.
Preview
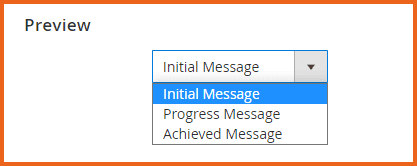
Option to choose the preview of the bar for different scenarios:
-
Bar State: Select the type of message you want to convey on the bar. Whatever will be the state of the user, the message on the bar will be displayed accordingly.
- Initial Message: When the customer visits your website, you can display an initial message as “Get Free Shipping for order over XYZ amount”.

- Progress Message: When the customer adds something to the cart, you can display a progress message on the bar e.g. “Only XYZ amount left for Free Shipping”.

- Achieved Message: When the customer achieves the target of free shipping you can display a message e.g. “Good News, your order will be delivered for free”.

GENERAL
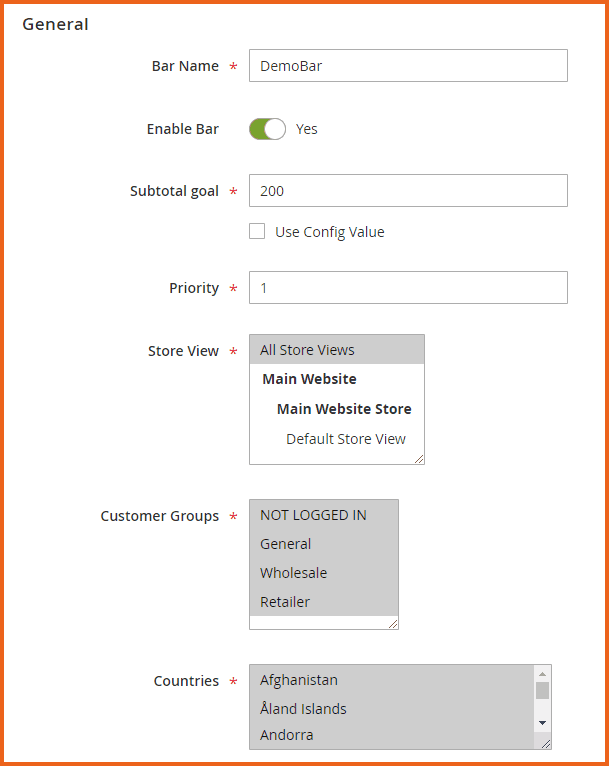
Option to choose the general settings of the bar:
- Bar Name: Enter a custom name for the bar
- Enable: Select ‘Yes’ or ‘No’ to Enable/Disable the bar on the frontend
- Subtotal Goal: Option to set the amount for which the free shipment applies e.g. 200. You can also use the Config Value Price (Price selected in configurations) by selecting the check box below this field.
- Priority: Option to set the display priority of the bar. ‘1’ means the highest priority and then it continues in ascending order.
- Store Views: Option to select the store views where you want to display the bar.
- Customer Groups: Option to choose the customer groups who can view the bar:
- Not Logged In
- General
- Wholesale
- Retailer
- Countries: Option to choose the countries where you want to display the bar. There is a list of countries in alphabetical order, you can choose any of them.
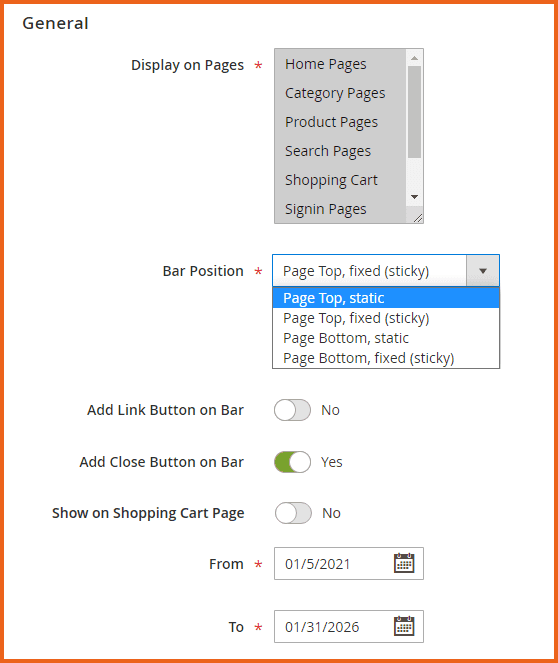
- Display on Pages: Option to select the website pages on which you want to display the bar. Select the "Other Pages" option only if you want to display the bar on all pages except those mentioned in this field.
- Bar Position: Option to choose the position of the bar:
- Page Top, Static
- Page Top, Fixed (Sticky)
- Page Bottom, Static
- Page Bottom, Fixed (Sticky)
- Add Link Button on Bar: Select ‘Yes’ or ‘No’ to Add/Remove the link button on the bar to insert any link in the bar.
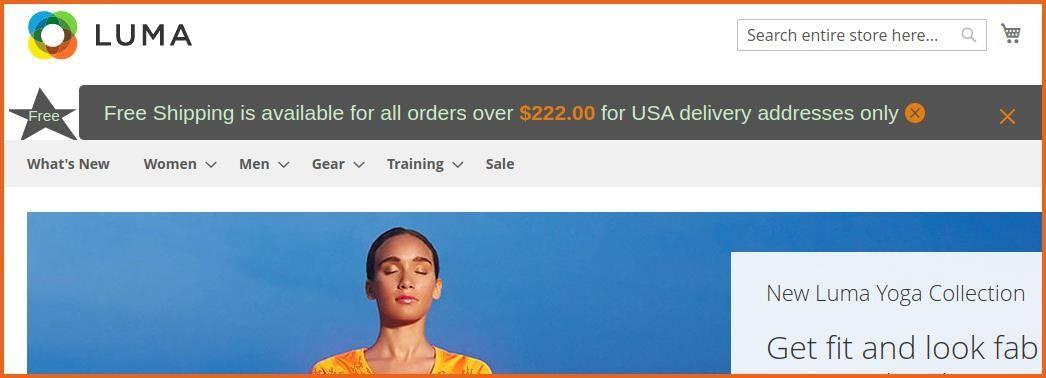
- Add Close Button on Bar: Select ‘Yes’ or ‘No’ to Add/Remove the close button on the bar (Cancel/Close Sign).
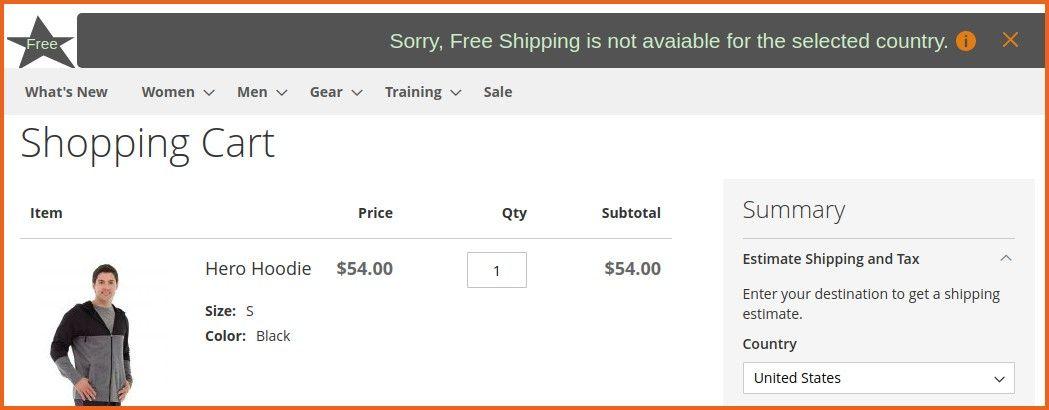
- Show on Shopping Cart Page: Select ‘Yes’ or ‘No’ to Show/Hide the bar on shopping cart page for non-applicable countries
- From: Option to select the starting date from which the bar will be enabled on the frontend.
- To: Select an ending date when the bar will expire or disable from the frontend.
Note: The free shipping bar will display on every address with terms written on the bar that free shipping is applicable to these specific countries; this is the functionality of our module. You can click on the “Terms & Conditions” icon to view the countries on which free shipping is allowed. Only you have the option to show/hide the bar on the shopping cart page based on the country selected by the customer.
Content
Option to enter the content which you want to display on the bar.
- Initial Message: When a customer visits your website, you can display the initial message as “Get free shipping for order over XYZ amount”.
- Progress Message: When the customer adds something to the cart, you can display a progress message in the bar like “Only XYZ amount left for free shipping”.
- Success Message: When the customer achieves the target of free shipping you can display a message like “Good News, your order will not include any shipping charges”.
- Free Shipping Terms: Option to write the terms for free shipping which you want the customer to know.

SVG
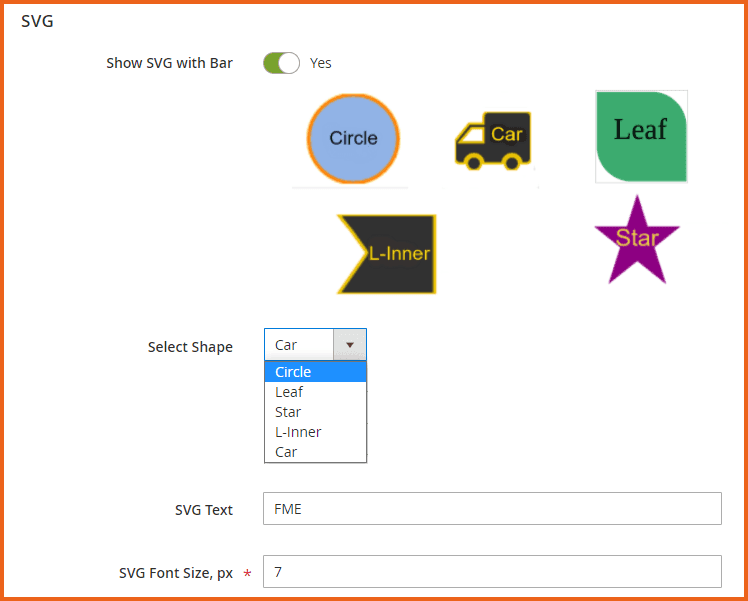
- Show SVG With Bar: Select ‘Yes’ or ‘No’ to Show/Hide SVG with the bar. You can choose any shape to display with the bar.
- Select Shape: Option to select the bar shape:
- Circle
- Leaf
- Star
- L-inner
- Car
- SVG Text: Option to write the text you want to display in SVG.
- SVG Font Size, px: Option to choose the font size of the text.
Design
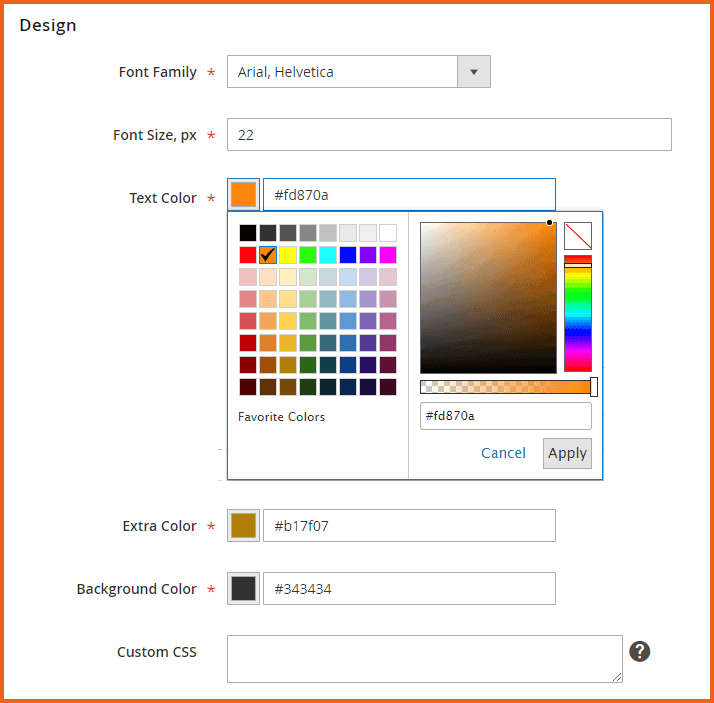
Option to select the design attributes of the bar:
- Font Family: There is a list of available fonts, you can select any for the text of the bar.
- Font Size, px: Option to enter the size of the font.
- Text Color: Option to choose the color of the text.
- Extra Color: Option to choose the extra color for the text.
- Background Color: Option to choose the background color of the text in the bar.
- Custom CSS: Option to write the custom CSS for the bar.
Frontend
Cart Page Country Check
