User Guide of Magento 2 Cross Links Extension
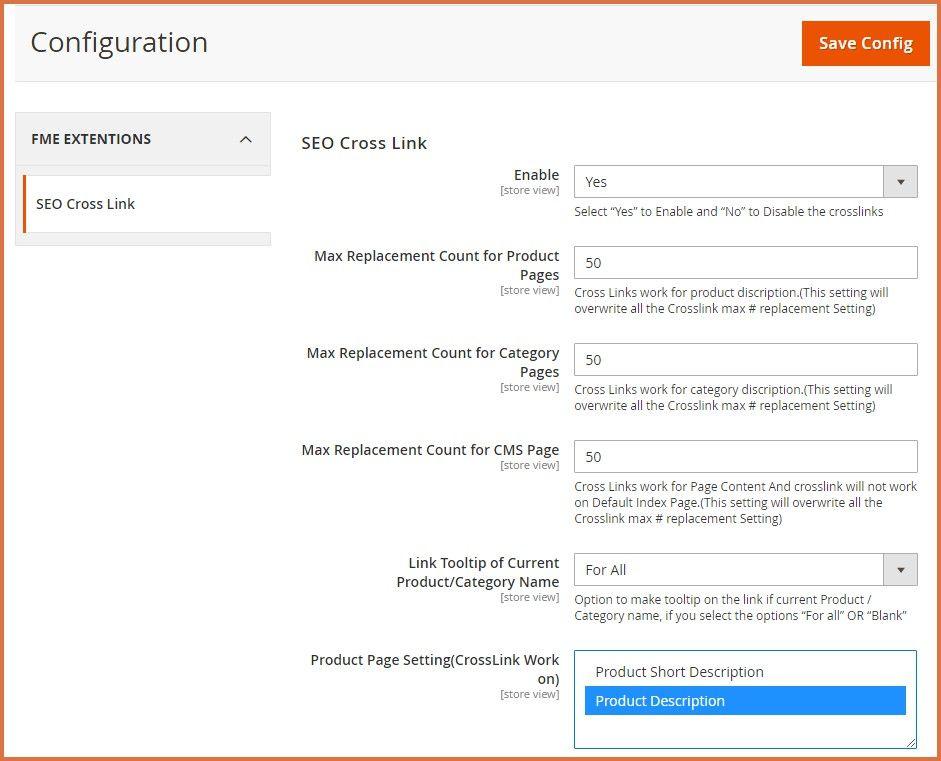
At the backend, go to FME EXTENSIONS > Configurations. Here you can find the extension configurations.
General Configurations
- Enable Module: Option to Enable / Disable the module
- Max Replacement Count for Product Pages: Option to set a limit for the maximum number of words which should get replaced with the link on product page
- Max Replacement Count for Category Pages: Option to set a limit for the maximum number of words which should get replaced with the link on the category page
- Max Replacement Count for CMS Pages: Option to set a limit for the maximum number of words which should get replaced with the link on CMS pages
- Link Tooltip of Current Product / Category Name: Options to make tooltip on the link of Product / Category name
- Don’t Use
- For All
- For Blank
- Product Page Setting (Crosslink Work on): Option to set the working cross-link among Product Description or Product Short Description
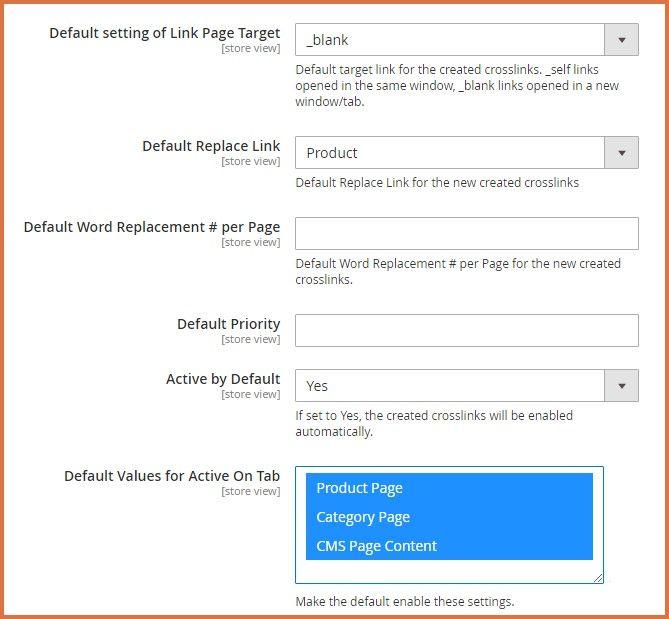
- Default Setting of Link Page Target: Options to set the target of the link, choose blank to open in a new tab and choose self to open in existing tab
- Blank
- Self
- Default Replace Link: Option to set default link to replace for the newly created crosslink
- Custom URL
- Product
- Category
- Default Word Replacement # Per Page: Option to set the count for word replacement per page
- Default Priority: Set priority of the crosslink, priority which is been set here will overrule all the other ones
- Active by Default: If set to Yes, the created crosslinks will be enabled automatically.
- Default Values for Activated Tabs: Options to set default values for activated tabs
- Product Page
- Category Page
- CMS Page Content
How To Add a New Crosslink?
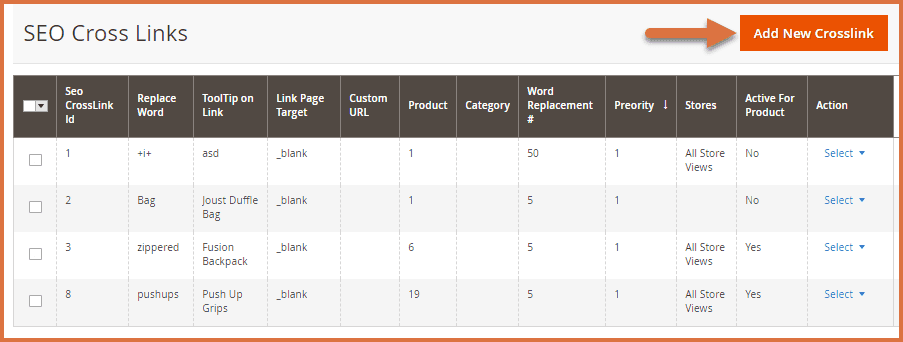
At the back end, go to MARKETING > CROSSLINKS. Here you can find the list of all the existing crosslinks. Also, there is the option to add a new cross-link. By clicking the ADD NEW CROSSLINK button (placed at the right top), you will be directed to form-page where you will have to provide all the details of the crosslink which you are going to add.
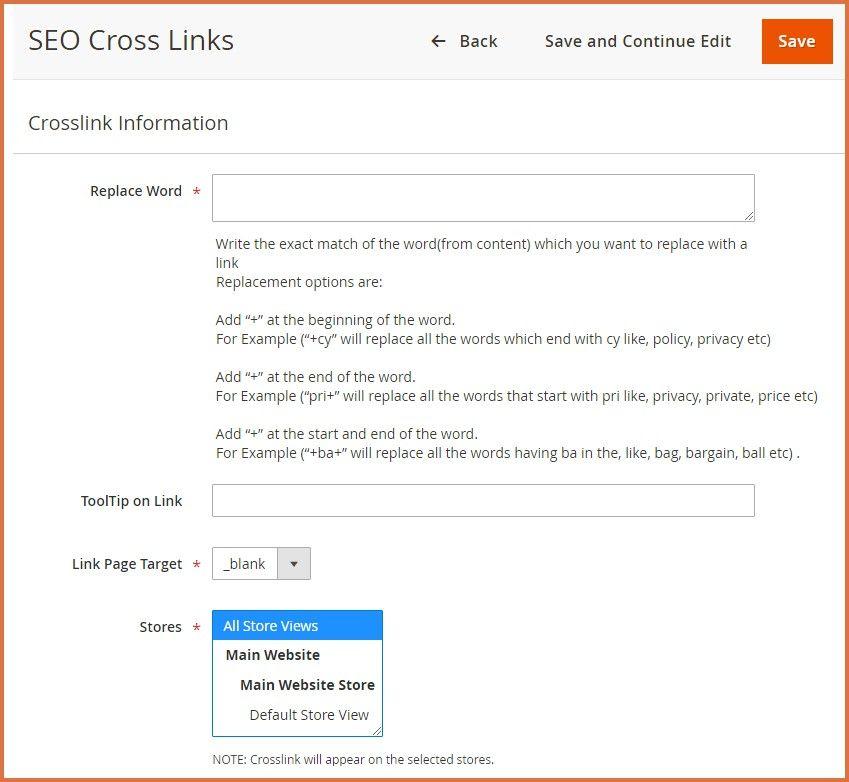
- Replace Word: Option to write the exact match of the word (from content) which you want to replace with a link. Replacement options are:
- Add “+” at the beginning of the word. For Example (“+cy” will replace all the words which end with cy like, policy, privacy, etc)
- Add “+” at the end of the word. For Example (“pri+” will replace all the words that start with pri like, privacy, private, price, etc)
- Add “+” at the start and end of the word. For Example (“+ba+” will replace all the words having ba in the, like, bag, bargain, ball, etc)
- Tooltip on Link: Option to set a tooltip for the crosslink
- Link Page Target: Option to set link page target
- Blank
- Self
- Stores: Option to set store view properties (crosslink will appear on the selected store views)
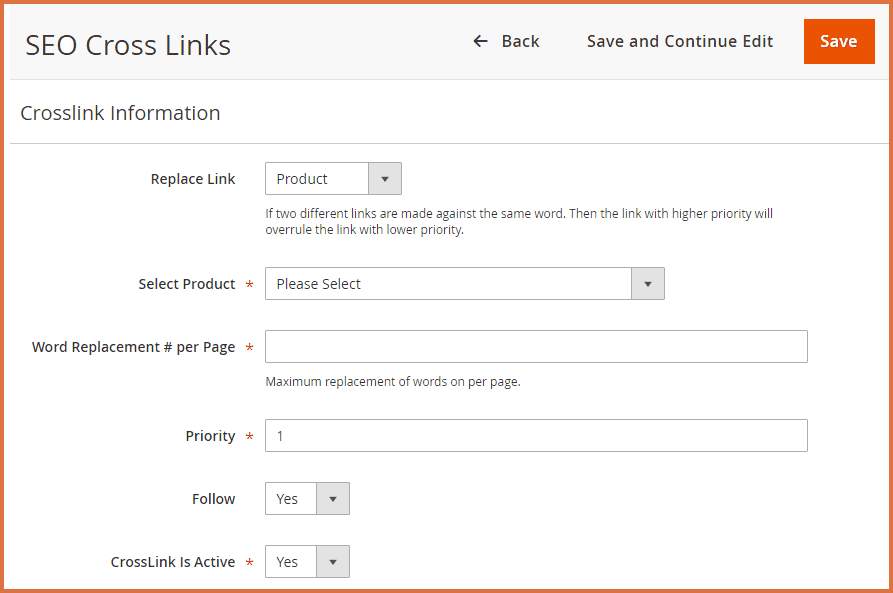
- Replace Link: Option to set link replacement. If two different links are made against the same word. Then the link with higher priority will overrule the link with lower priority:
- Custom URL
- Product
- Category
If the user selects the option CUSTOM URL, then a text box with the title “Custom URL” will appear on the screen, where He / She will have to provide the URL.

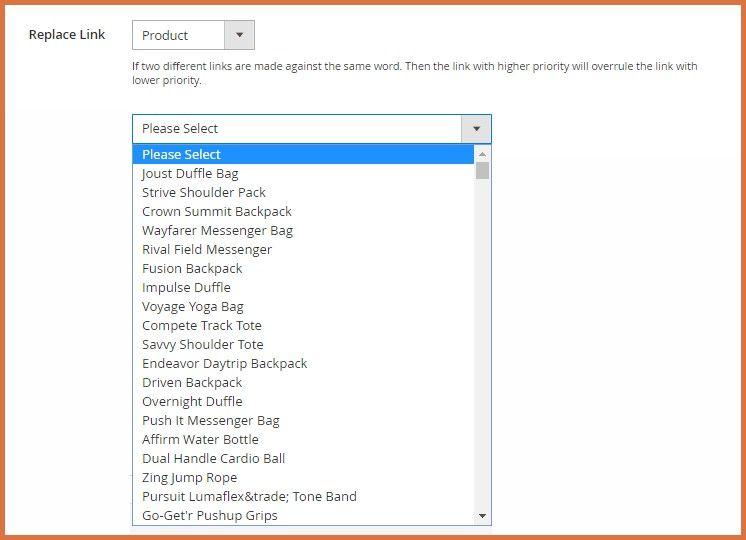
If the user selects the 'PRODUCT' option, a drop-down list will appear, allowing them to choose the product to which the link should be mapped.
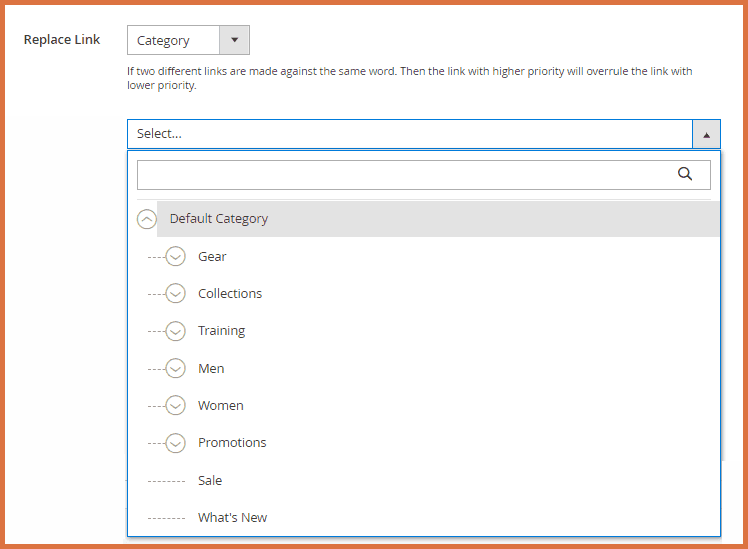
If the user selects the 'CATEGORY' option, a drop-down list of categories will appear, allowing them to choose the category to which the link should be mapped.
- Word Replacement Per Page: Option to set maximum replacement of words per page
- Priority: Option to set the priority of the crosslink
- Follow: Option to set the cross-link as Do-Follow / No-follow
- Yes
- No
- Crosslink is Active: Option to activate crosslink or not
- Yes
- No
ACTIVE ON
- Active for Product: Option to activate crosslink for products
- Yes
- No
- Active for Category: Option to activate crosslink for categories
- Yes
- No
- Active for CMS Page: Option to activate crosslink for CMS pages
- Yes
- No
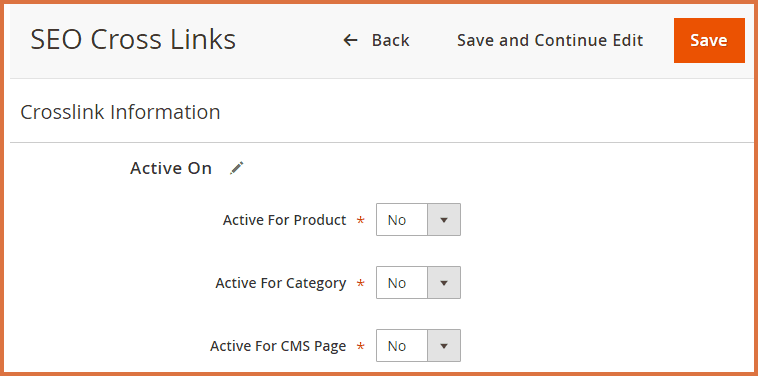
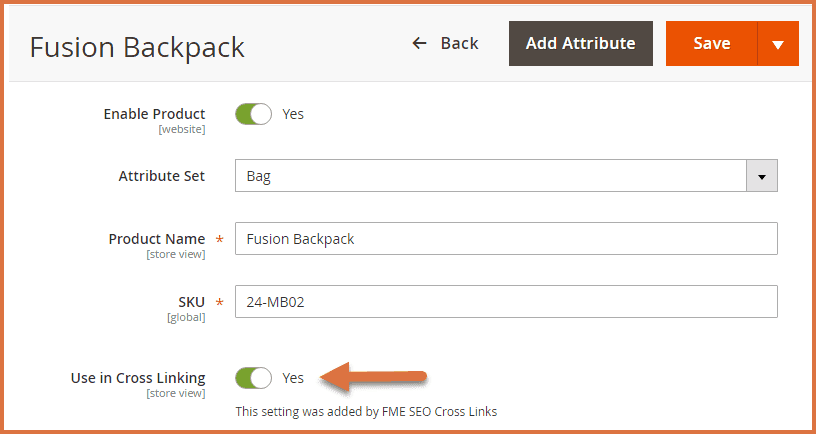
After adding a new crosslink, you need to enable it on the products you want to configure. To do this, go to Catalog > Products and select the product from the catalog list. Then, open the product's properties and enable the crosslink. The crosslink will be activated for that product. The same process applies to categories and CMS pages—open each from the backend and configure the crosslink accordingly.
