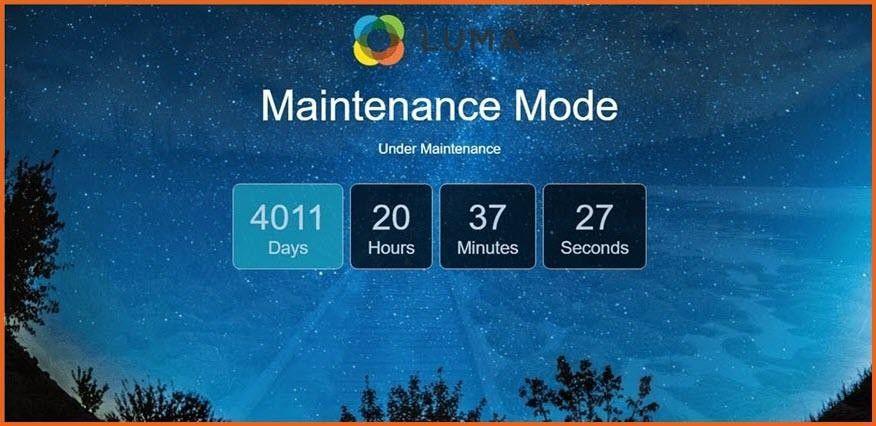
User Guide of Magento 2 Coming Soon Page Extension
General Configurations
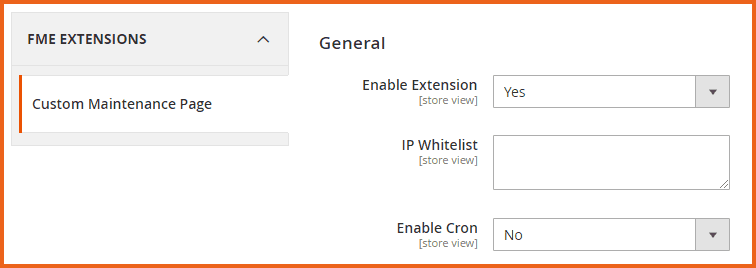
At the backend, go to FME EXTENSIONS > Configurations. Here you can find the extension configurations.
- Enable Extension: Choose ‘Yes’ or ‘No’ to Enable or Disable the Extension
- IP Whitelist: Enter the IP addresses here. IP's entered in the textbox are allowed to by-pass, both maintenance and coming soon pages.
- Enable Cron: Choose ‘Yes’ or ‘No’ to Enable or Disable the cron job
Google reCAPTCHA
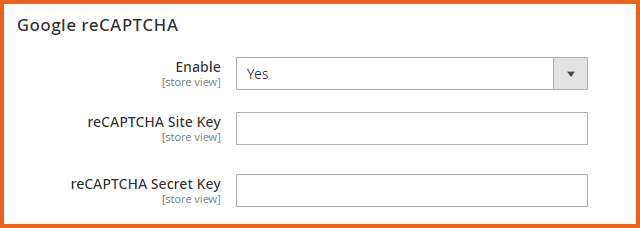
- Enable: Choose ‘Yes’ or ‘No’ to Enable or Disable Google reCaptcha
- reCAPTCHA Site Key: Enter your Google reCAPTCHA site key or generate a new one from https://www.google.com/recaptcha/admin
- reCAPTCHA Secret Key: Enter your Google reCAPTCHA site key or generate a new one from https://www.google.com/recaptcha/admin
Admin Email Notifications
- Send Email To: Enter an email address on which the user sends notifications Or Leave it empty to disable the notifications.
- Email Sender: Option to choose the sender for the admin reply email:
- Email Template: Option to choose the template for the admin reply email

Auto Reply Email Options
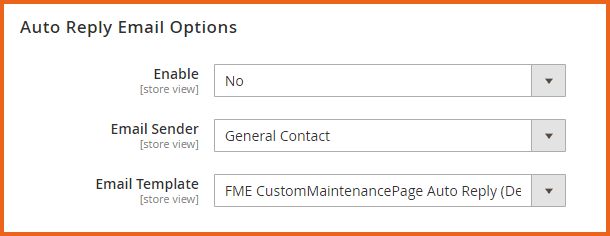
- Enable: Select ‘Yes’ or ‘No’ to Enable/Disable this option. If you select ‘Yes’, confirmation email will be sent automatically to the user.
- Email Sender: Option to select the email sender through which auto emails will be sent to users.
- Email Template: Option to select the email template which will be used for auto-reply of the customer emails.
How to Manage Custom Maintenance Page?
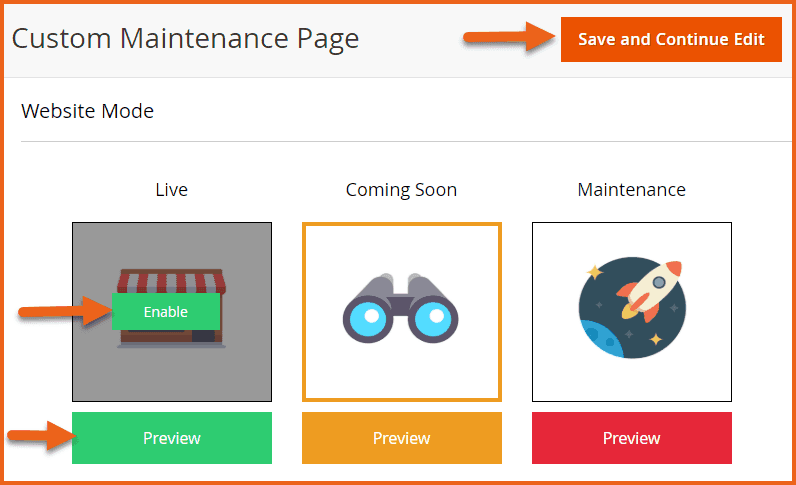
At the backend, go to FME EXTENSIONS > CMP Manage. Here you will find the following settings:
Hover over any website mode and press the "Enable" button to select it, then click the "Save and Continue Edit" button to save the selected mode. The admin can preview each mode by clicking the "Preview" button. When the extension is enabled, all three modes can be previewed from the backend, regardless of the currently selected mode.
- Live Mode: When live site mode is enabled, all the users will be redirected to the store’s main page.
- Coming Soon Mode: When coming soon mode is enabled, all the users will be redirected to coming soon page except allowed pages.
- Maintenance Mode: When maintenance mode is enabled, all the users will be redirected to the maintenance page.
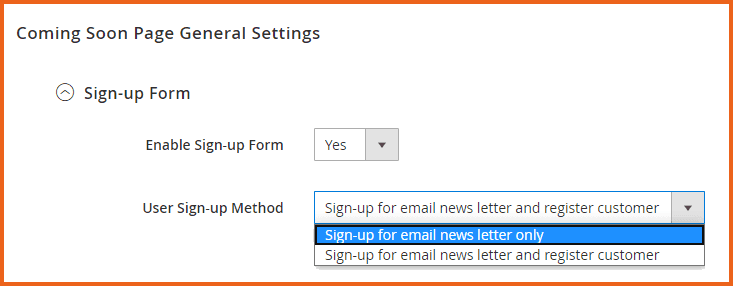
Coming Soon Page General Settings
With these settings, you can configure the frontend of the coming soon page:
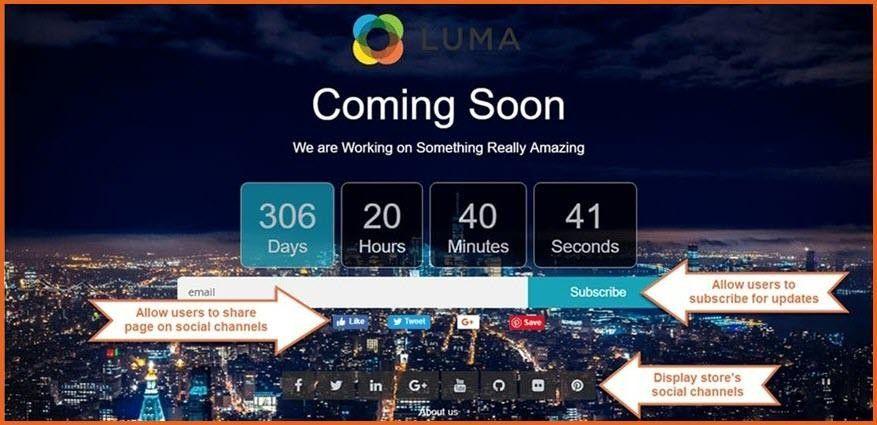
- Enable Sign-Up Form: Choose ‘Yes’ or ‘No’ to Enable or Disable the sign-up form. If you enable it, a signup form will be displayed on the coming soon page. So, the new users can sign up for the newsletter or register themselves as a customer before the store’s launching.
- User Sign-Up Method: Choose the sign-up method:
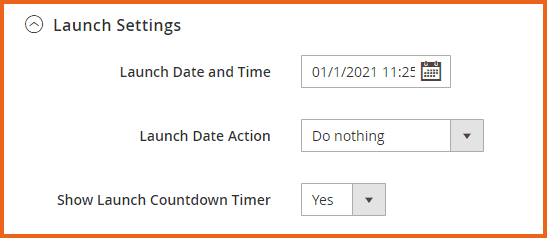
Launch Settings
Assign the flash sale to a category. If the discount field is left empty, the above discount will be applied to that particular category.
- Launch Date and Time: Schedule the launch date & time. This date will be the launching date for the store and as well as used for the countdown timer.
- Launch Date Action: The selected job will be executed on the launch date. Two things can happen when the store is launched, either the coming soon page displays a countdown timer equals to zero or the coming soon page can automatically be redirected to the store’s home page. You can select either option from the dropdown:
- Do Nothing
- Switch to Live Mode
- Show Launch Countdown Timer: Choose ‘Yes’ or ‘No’ to Show or Hide the launch countdown timer. If you select ‘Yes’, a countdown timer will be displayed on the coming soon page.
Text and Labels
- Heading Text: Enter the heading text for the coming soon page
- Welcome Text: Enter a welcome text for the coming soon page

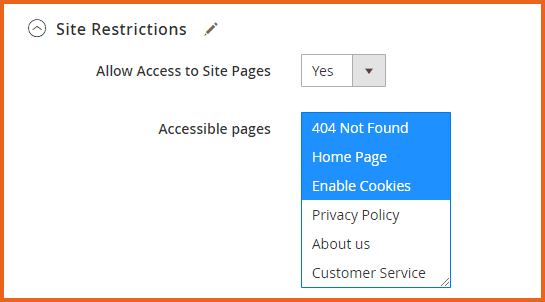
Site Restrictions
- Allow Access to Site Pages: Choose ‘Yes’ or ‘No’ to Enable or Disable access to the site pages. If you select ‘Yes’, accessible pages of the store are displayed on the bottom of the coming soon page.
- Accessible Pages: Select the pages which can be selected as accessible pages.
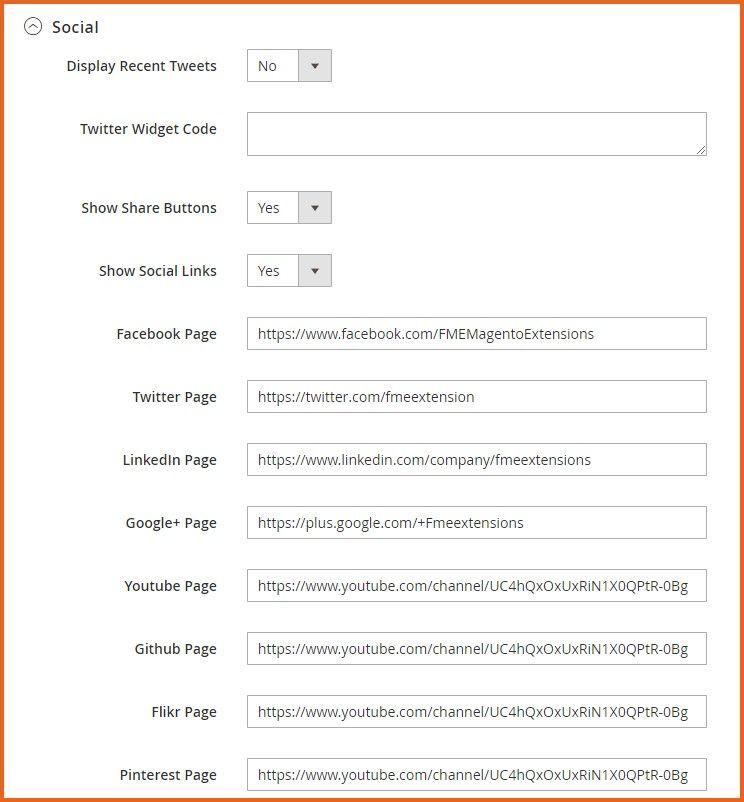
Social
- Display Recent Tweets: Choose ‘Yes’ or ‘No’ to Show or Hide the recent tweets on the coming soon page
- Twitter Widget Code: Create & Insert twitter widget code for your account here, so recent tweets can be displayed on the coming soon page.
- Show Share Buttons: Choose ‘Yes’ or ‘No’ to Show or Hide the social sharing buttons on the coming soon page
- Show Social Links: Choose ‘Yes’ or ‘No’ to Show or Hide the social links on the coming soon page (Note: Links can be displayed at the bottom of the page). Different textboxes are available to insert the social links, which are used for the above social buttons.
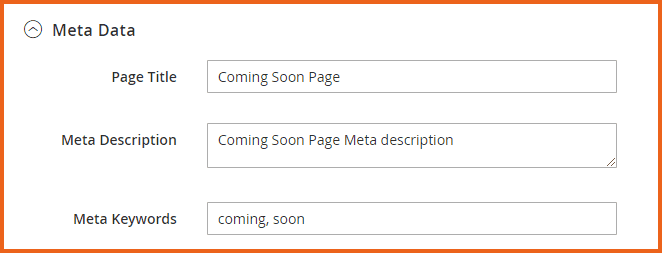
Meta Data
- Page Title: Enter a page title for the coming soon page
- Meta Description: Enter a meta description for the coming soon page
- Meta Keywords: Enter meta keywords for the coming soon page
Background Settings
- Background Style: Choose from the three different backgrounds that are available for the coming soon page:

Maintenance Page General Settings
With these settings, you can configure the frontend of the maintenance page:
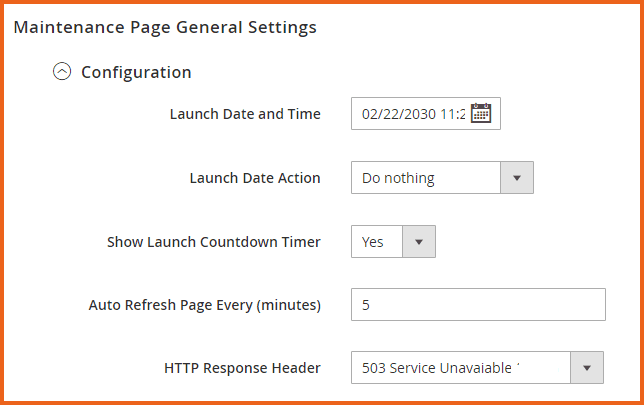
Configuration
- Launch Date and Time: Schedule the launch date & time. This date will be the launching date for the store and as well as used for the countdown timer.
- Launch Date Action: The selected job will be executed on the launch date. Two things can happen when the store is launched, either the maintenance page displays a countdown timer equals to zero or the maintenance page can automatically be redirected to the store’s home page. You can select either option from the dropdown:
- Show Launch Countdown Timer: Choose ‘Yes’ or ‘No’ to Show or Hide the launch countdown timer. If you select ‘Yes’, a countdown timer will be displayed on the maintenance page.
- Auto Refresh Page Every (Minutes): Enter the minute(s) in this field and the maintenance page will refresh automatically after the entered minute(s) and send a response header to the search engine.
- HTTP Response Header: Select the response header to notify the search engine that your site is temporarily unavailable.
Text and Labels
• Heading Text: Enter the heading text for the maintenance page • Maintenance Description: Enter a description text for the maintenance page

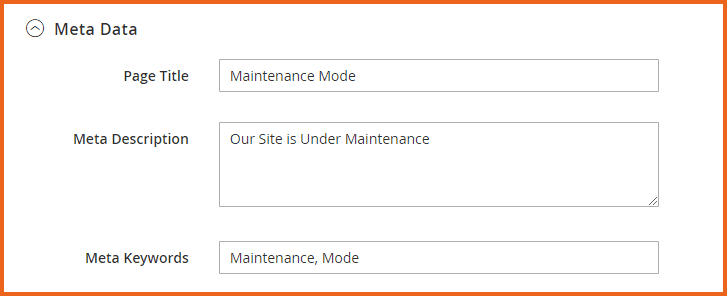
Meta Data
- Page Title: Enter a page title for the maintenance page
- Meta Description: Enter a meta description for the maintenance page
- Meta Keywords: Enter meta keywords for the maintenance page
###Media Settings
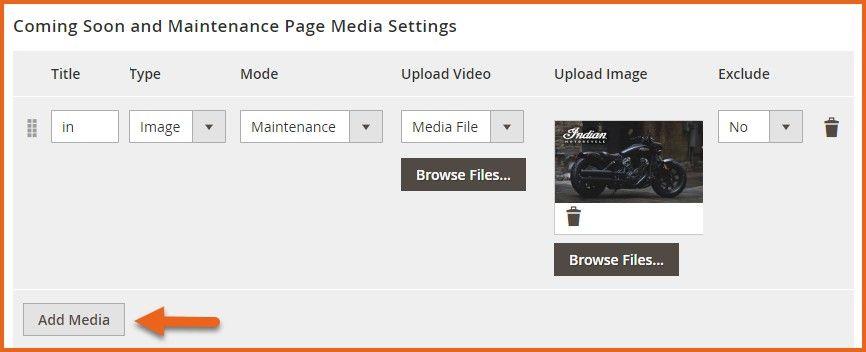
This media is used for the background settings of the coming soon and maintenance pages. Both images and videos can be uploaded as backgrounds. Simply click on the "Add Media" button, then enter, select, or upload the desired media to successfully add it.
- Title: Enter a title for the media file i.e. image or video file
- Media Type: Select the type of media file to upload:
- Mode: Select mode for the media file. By selecting the mode, you are assigning the media file to either coming soon or the maintenance page.
- Upload Video: Two options are available to upload the video file. When Video is uploaded through URL the other fields i.e. Title and Upload Image are selected automatically from the uploaded video.
- Upload Image: Upload an image for the selected page
- Exclude: Choose ‘Yes’ or ‘No’ to Include or Exclude the media. If you selected ‘Yes’, the media will be excluded to display on the frontend of coming soon and maintenance page.
Conditions for Media Settings
- Case 1: The ‘Upload Image’ field is being used for two purposes, depending on the media type. If the media type ‘Image’ is selected, then this field is used for uploading image media. On the other side, if media type ‘Video’ is selected, then this field is being used as a video thumb and not as an image media.
- Case 2: If media type ‘Video’ is selected and video is not uploaded then this media is invalid and can’t be saved for either mode.
- Case 3: If media type ‘Video’ is selected and video is uploaded through the local computer as a file, then thumb for this video must be uploaded through upload image.
- Case 4: If nothing is uploaded in the media settings of coming soon and the maintenance page, the background of coming soon or the maintenance page will be displayed blank.
- Case 5: Latest Image or Video, which belongs to coming soon and the maintenance page will be used as a background.
Set Custom Page
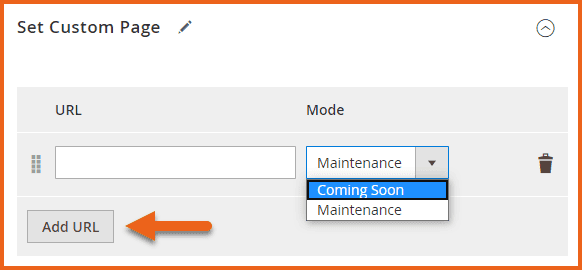
Option to add custom page link (URL) and convert it to the maintenance page or coming soon page.
Frontend
Coming Soon Page
Maintenance Page
