How to Add Delivery Date to the Checkout Page in Magento 2?
eCommerce is a highly competitive industry since you are not just competing with local stores but also those operating from abroad. On top of it, you have the giants like Amazon, Walmart, Alibaba, AliExpress, and more. Despite this competition, eCommerce can prove to be quite a lucrative career for you.
Our experience tells us that customers reward stores that offer excellent customer service and user experience (UX). Thus, even if you are a small online store, you can carve out a good market share, provided you focus on these two areas. One way to enhance the UX is by customising the checkout page.
The reason we are stressing on the checkout page is because the default Magento 2 checkout page does not offer much to users or the store admin. By adding relevant custom fields to this page, you can enhance the UX and gain information that can allow you to hyper personalise your marketing strategies.
Thus, it is a win-win situation for all the parties involved in the process. The second reason to revamp the Magento 2 default checkout page is because of the high cart abandonment rate. Every store is facing a problem of cart abandonment as evident from the below statistic.
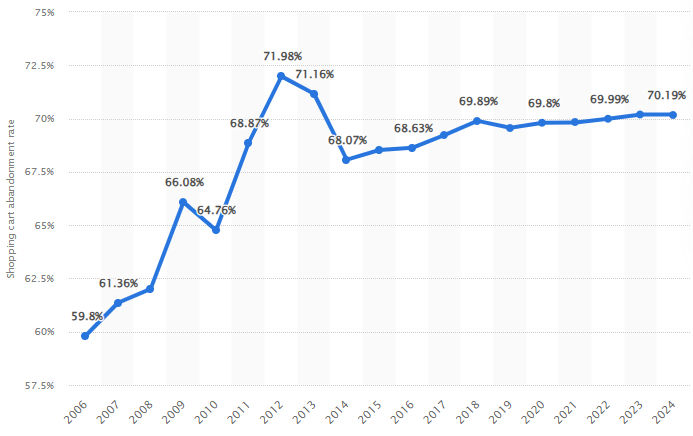
As you can see from the above image, the global digital cart abandonment rate is more than 70%. It is quite perplexing given the advancements in technology, marketing analytics, and unparalleled levels of user information that brands have nowadays. Hence, there is no option but to customise the default Magento 2 checkout page.
Customising the Magento 2 Checkout Page
Of course, when talking about the customisation, there are countless options. What custom fields you need to add and what should you remove. In this article, we are going to specifically focus on only one customisation – Magento 2 order delivery date. In other words, adding the delivery date to the checkout page in Magento 2.
Why Magento 2 Add Delivery Date to Checkout is Important?
Adding a delivery date to the Magento 2 checkout page offers several benefits.
Customer Satisfaction
It enhances the overall customer experience since customers have greater control over when they can receive the product. They can plan their schedule accordingly.
Delivery Optimisation
Shipping is not free and is a considerable expense for any online store. When customers are given the option to select a delivery data, store owners can schedule other delivers in nearby areas for the same date. This can help improve operational efficiency.
Reduces Cart Abandonment
The option of a delivery date reduces the cart abandonment rate. Uncertainty regarding delivery dates or unexpected delays often causes customers to abandon their shopping carts.
Reduces Customer Support Requests
Additionally, offering a delivery date option reduces the volume of customer inquiries related to delivery times. Customers can easily access this information during the checkout process, reducing the need for them to contact customer support for clarifications. This can free up your customer support agents to focus on users that really require help.
Reduces Failed Deliveries
Suppose you sent the product for delivery, but the customer was not available to receive it. A failed delivery can undermine your store’s finances and even impact user satisfaction even though its not the store’s fault.
How To Add Delivery Date to the Checkout Page in Magento 2?
There is no built-in option in Magento 2 to add a delivery date to the checkout page. To do so, you will either need to develop a custom module or use third-party extensions like our Custom Checkout Fields extension. This extension allows you to add any type of field to any checkout step.
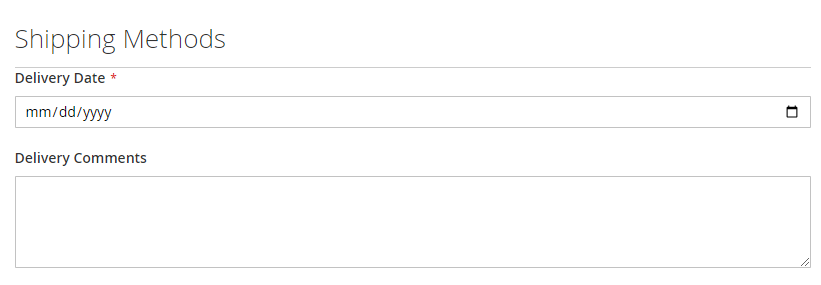
For the purpose of this article, we will add 'Delivery Date' and 'Delivery Comments' fields to the Shipping Methods step of the checkout page using the extension. You can even use the extension to add delivery date and time to the custom field. For now, let's see how to use the extension to add delivery date and comments only.
Using the Extension to Add Order Delivery Date in Magento 2
After installing the extension, login to your Magento 2 admin panel and navigate to FME Extensions > Manage Fields > Add New Attribute.
Under the Attribute Properties section, configure the following options.

- Default Label: Enter a label for the custom field to show on the frontend
- Catalog Input Type: Select the type of field
- Values Required: Make the field mandatory or optional
Under the Advanced Attribute Properties section, you have the following options.
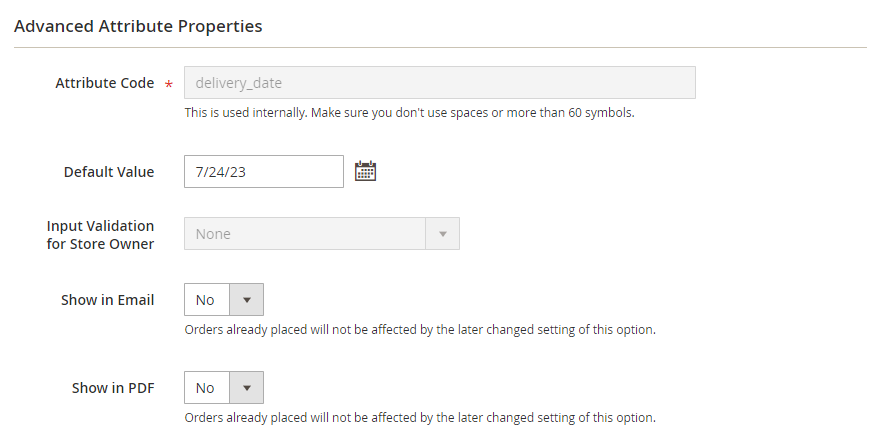
- Attribute Code: Enter an attribute code for internal purposes.
- Default Value: Select a date that will show by default.
- Input Validation: Choose if you want to validate the input data i.e. decimal number, integer, email, ULR, letters, etc.
- Show in Email and PDF: Select 'Yes' to show the field data in invoice email and PDF.
Below you have the options to limit the field to specific store view and customer groups.
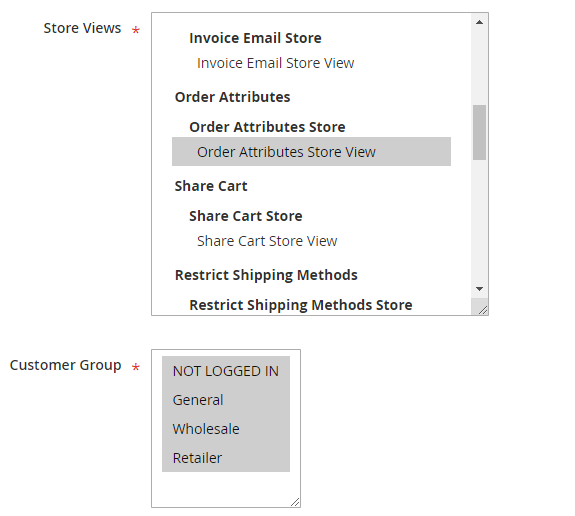
Now click on the Storefront Properties tab where you have the following options.
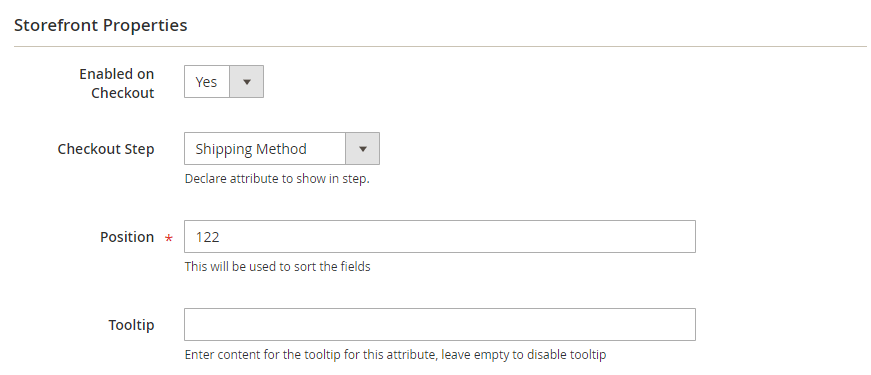
- Enabled on Checkout: Select 'Yes' to enable the field on the checkout page.
- Checkout Step: Select the checkout step to show the custom field.
- Position: Give a number to sort the field.
- Tooltip: Provide additional information about the field that will appear on mouse hover.
Now if you go to the checkout page, you will see Delivery Date and Delivery Comments fields in the shipping methods step as shown below.
Conclusion
The users can add the delivery time in the delivery comments. The other option is to provide a delivery date and time field in Magento 2 separately using this extension. If you want to customize your checkout page to collect additional data from your customers, custom checkout fields extension is the way forward. Contact us if you face any trouble using, installing, or customising this extension.
Check Out Other Extensions:This blog was created with FME's SEO-friendly blog


