Newsletters are an important medium for communicating information with customers, employees, and other stakeholders. Before we delve into setting up newsletters in Magento 2, let’s first develop an understanding of newsletters.
What is a Newsletter?
A newsletter is an electronic or printed report detailing an organisation’s activities. In the context of eCommerce, the newsletter is usually an electronic version describing what the business is doing to its subscribers. The newsletter is primarily limited to one topic of interest. For example, the newsletter may be focused on a new product, shipping method, or any other feature offered by the store. The subscribers can be the customers, employees, or others who have signed up for the newsletter.
Importance of Newsletters
Awareness
One of the most noticeable benefits of a newsletter is that they help build awareness. An eCommerce store can use the newsletter to share information about new features, products, and anything else related to the business. They are more effective in communicating important information compared to ads.
Establish Expertise
Similarly, newsletters can be a great way to showcase one’s expertise in a particular area or niche. It can help convince the target audience that your brand is better than the others.
Direct Communication
Social media channels often implement filters that limit a post’s reach. In other words, your audience may never come across the information. Even if there are no filters, social media is a place where users are bombarded with content. It is quite likely that some users may not pay attention to your post at all.
Increased Traffic
Magento 2 store owners can place links to their website and/or social media channels in the newsletters. This will lead to an increase traffic. Naturally, the higher the traffic, the more chances of increased sales.
Brand Recognition
Frequent newsletters help in increasing brand recognition. Users will equate your brand with a niche. This helps keep the brand on top of their minds. Thus, whenever a user needs a product related to your niche, they are likely to search for it on your website.
How to Configure Magento 2 Newsletters
- Step 1 -> Go to your Magento 2 Admin Panel
- Step 2 -> Go to Stores ->Settings -> Configuration
 Step 3 -> Under Customers, find and select Newsletter
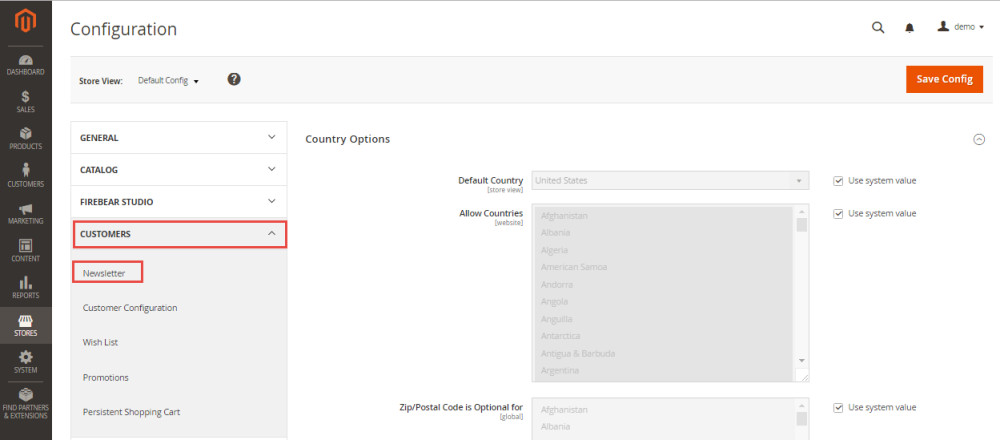 Step 4 -> Expand the Subscription Options
You will come across various options. Here’s what you need to do:
- Allow Guest Subscription: Select it either Yes or No depending upon your requirements.
- Need to Confirm: If you want subscribers to confirm the subscription, set it to Yes. set Yes or No based on your business requirement.
- Confirmation Email Sender: Magento 2 allows five different email addresses from whom the subscriber will receive the confirmation email.
- Confirmation Email Template: Select a template or use the default option.
- Success Email Sender: Magento 2 allows five different email addresses from whom a successful subscription email will be sent.
- Success Email Template: Either select the default option or a template.
- Unsubscription Email Sender: Magento 2 allows five email addresses from whom the users will receive an unsubscribe email.
- Unsubscription Email Template: Either select a template or the default option.
- To save changes, click Save Config.
How to Create Magento 2 Newsletter Templates
Creating a newsletter template easy all you have to do is navigate to the Marketing ->Communications ->Newsletter Template section from your main admin dashboard.
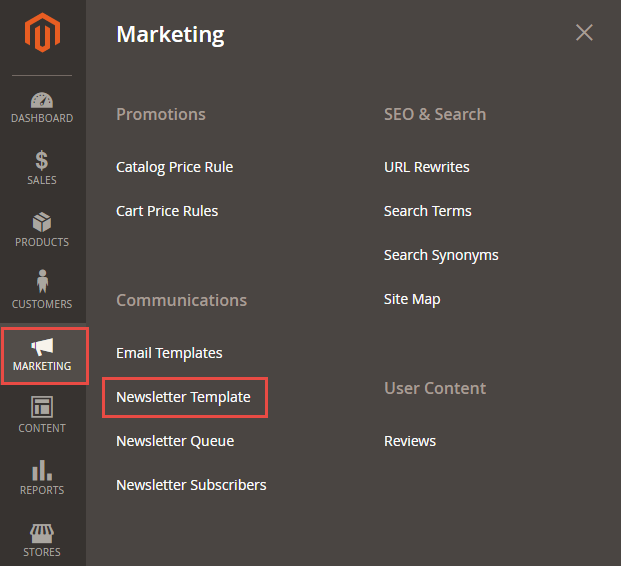
And then, just click on the Add New Template button to proceed with the configuration of the template.
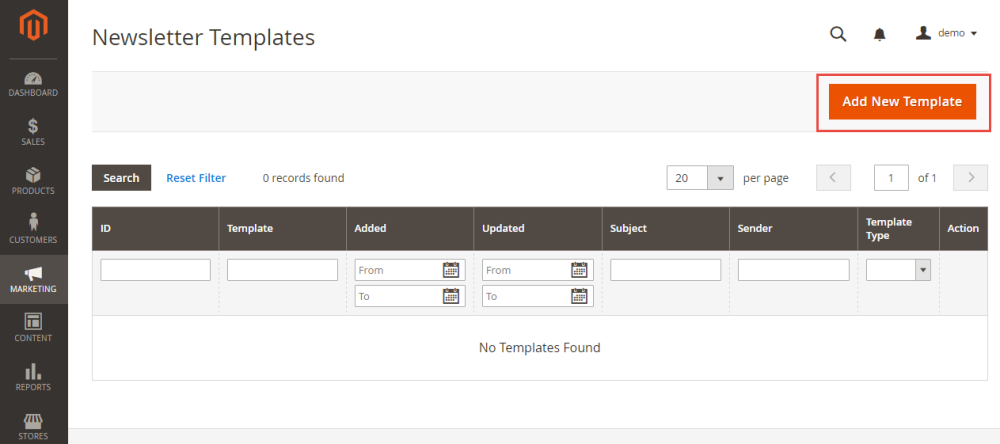
Fill the following fields in the Template Content field, and then click on the Save Template button.
- Set Template Name for the new Magento newsletter template
- Enter Template Subject to describe the purpose of newsletter
- Enter the Sender’s Name who is sending the Magento newsletters to the subscribers
- Enter the Sender’s Email that is the email address by which the newsletter is sent
- To enable the WYSIWYG editor, click on the Show/Hide Editor button at the top of Template Content field. It is flexible to edit and update the content as needed
- Enter any CSS declarations to format the content in the Template Styles field
The Template Content includes unsubscribe link in the WYSIWYG Editor, this is required by law. Please do not delete it.
Schedule and Send Magento Newsletters
Now click on the back button to return to the Magento 2 Newsletter Templates manager page. Click on the freshly added template and from the drop-down menu select the Newsletter Queue option.
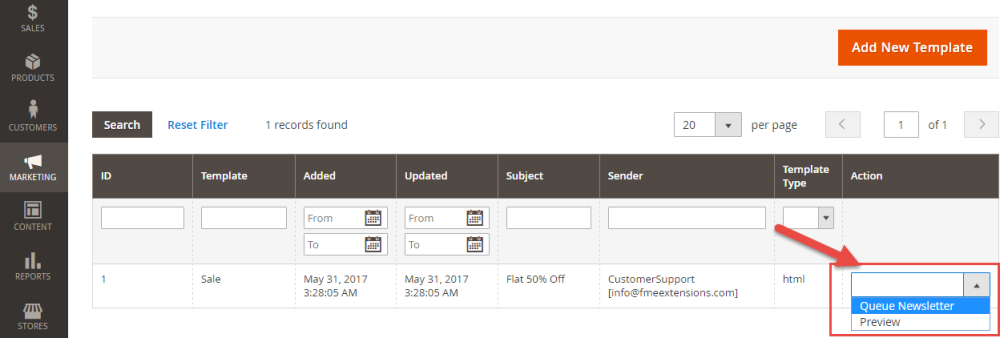
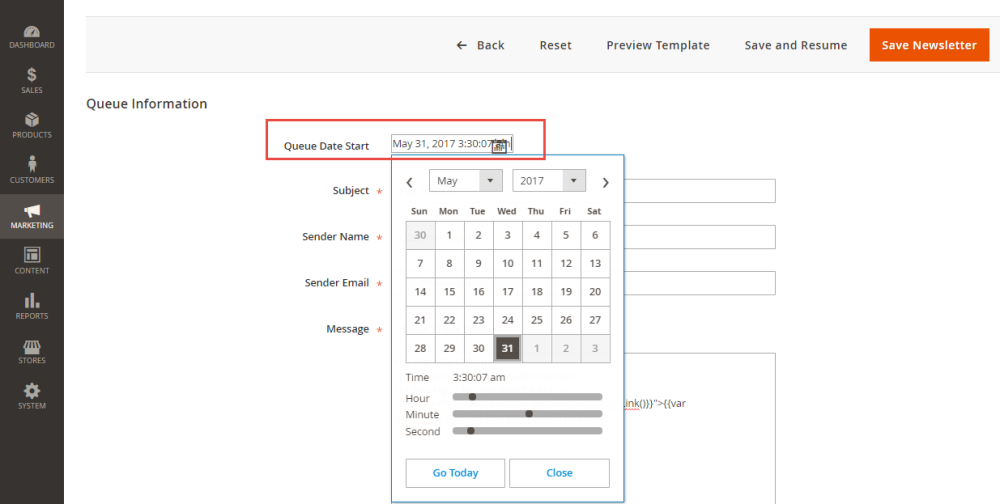
This will direct you to the queue where you can click on the calendar icon next to Queue Date Start to setup the time you want newsletter to be sent. Make use of the sliders and calendar to precisely setup the send time and press the Save Newsletter button.
Check Newsletter Problem Reports
If you are observing some issues with your Newsletters or if your customers are complaining that some of them haven’t received their emails, you can check for troubleshoot in the report located in Reports -> Newsletter Problems Report.
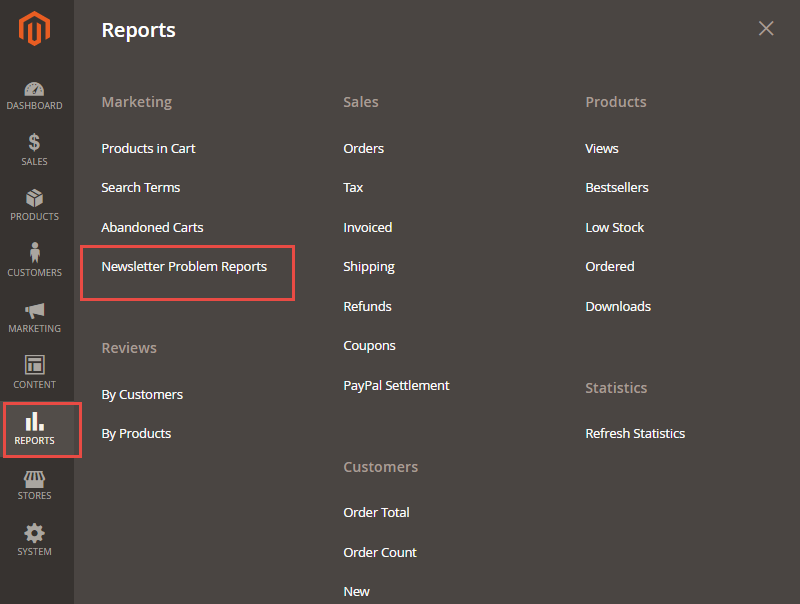
Here on this page, you will be able to see a detailed report with time and date and exact error number or text for the mails that have failed to send.
Magento 2 Newsletter Extension by FME
Most merchants talk about low newsletter subscription rates. If you wish to overcome this problem, then the Magento 2 Newsletter Extension by FME can prove helpful. It offers numerous features, including:
- Create Multiple Popups to Enhance Newsletter Subscription Rates
- 20 Different Popup Templates
- Even-based Popups
- Set Multiple Conditions for Popup Display on Any Selected Product
Final Thoughts on Magento 2 Newsletters
This concludes our article on Magento 2 newsletters and how to configure Magento 2 newsletter templates. Contact our support team if you have any questions related to this topic.
Read More:This blog was created with FME's SEO-friendly blog


